How to use GO
Here’s what this article covers:
- What is GO?
- How do I start GO?
- Track your trip with GO
- GO settings
- Share your GO trip
- Trip history
- Battery, data, and privacy
What is GO ?
Transit’s GO feature helps you navigate your local transit system by sending notifications to guide you through a trip step-by-step.
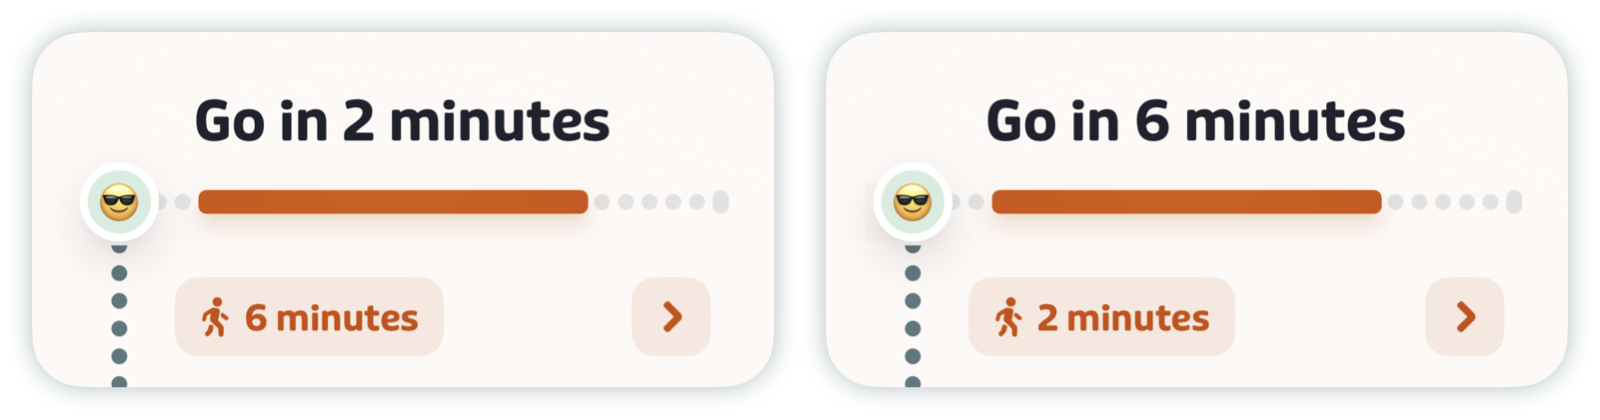
- Go in … minutes, so you know when to start heading to your stop.
- Hurry up!, if you might miss your ride.
- 5…4…3…2..more stops, as you get closer to your destination stop.
- Your stop is next!, when your stop is next.
- This is your stop!, when you're at your destination.
Once launched, GO runs in the background and works with voice notifications, so you can get lost in your music or take a nap without worrying about missing your stop. GO then ends automatically when you've reached your destination.
Plus, when you ride with GO, you provide other riders on your line with more accurate real-time tracking information. The more you use GO, the more people you help!
More info: What is GO crowdsourcing?
How do I start GO?
Note: You can only start GO for trips that leave in the next 60 minutes. GO is not supported on multimodal trips.
From a trip plan
- Tap the search bar then type your destination to plan a trip.
- Tap the search result that best meets your needs.
-
On the trip details screen, tap GO.
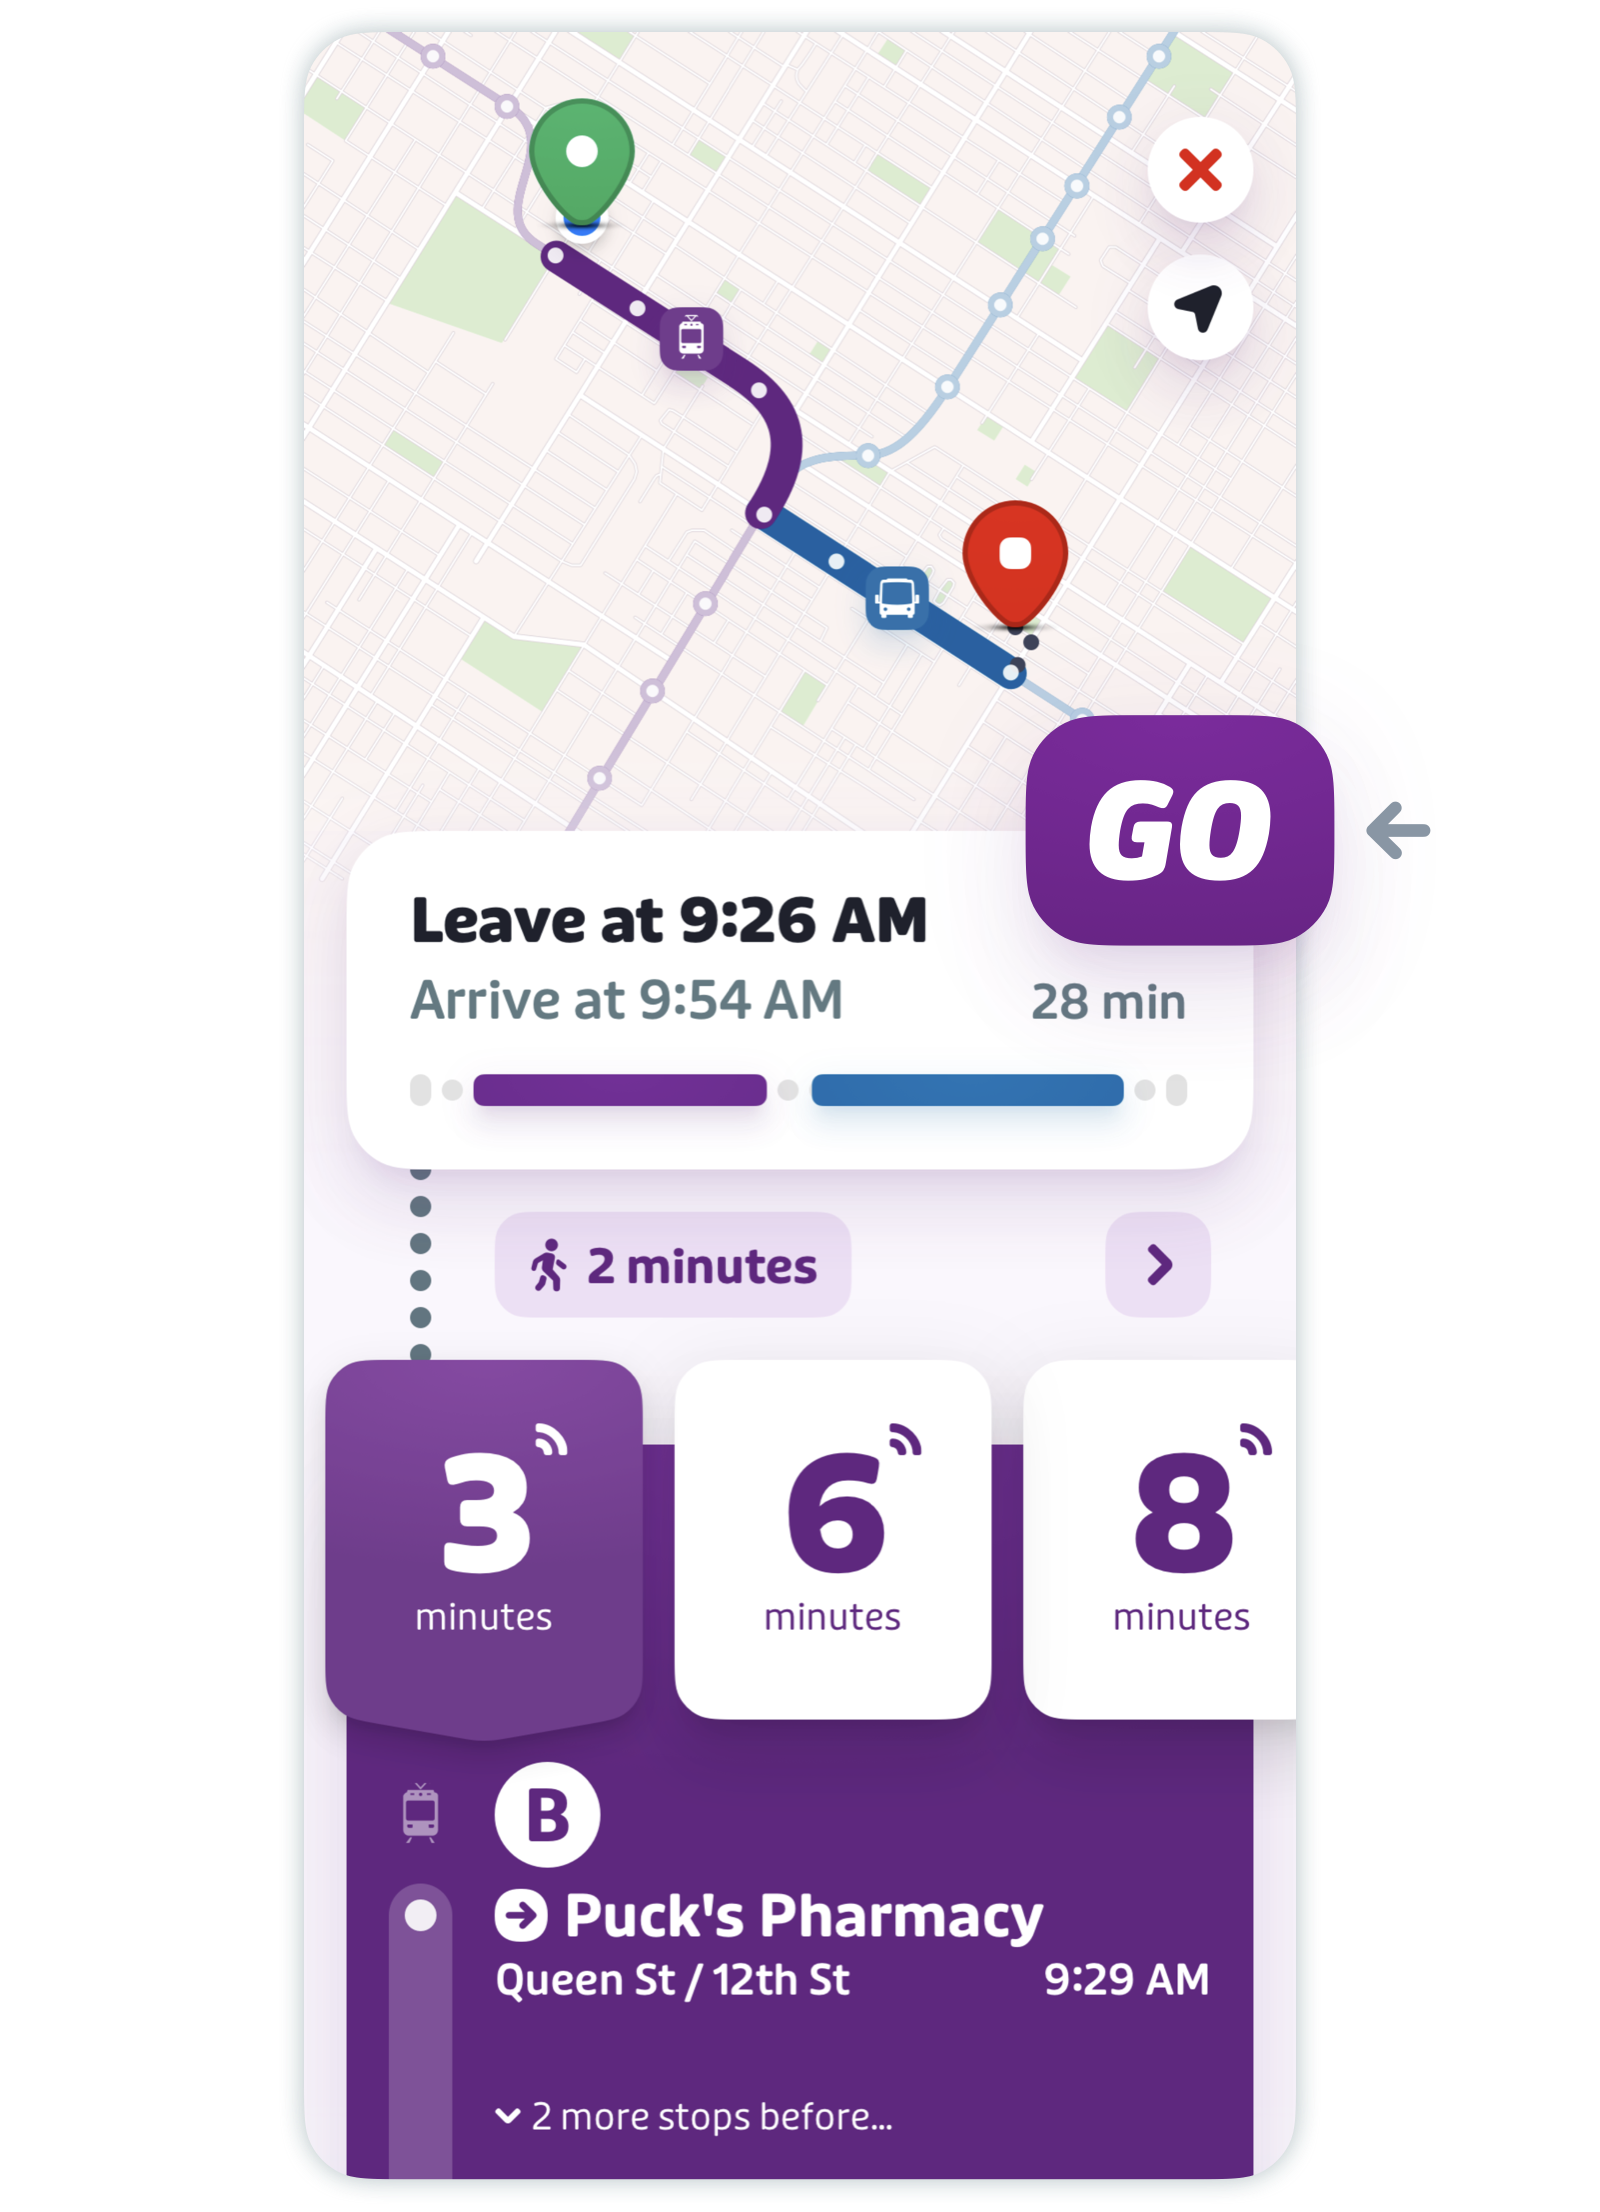
-
You can switch to a different departure on each leg of your trip by tapping on the appropriate ETA card! GO will automatically update to reflect the departures you selected.
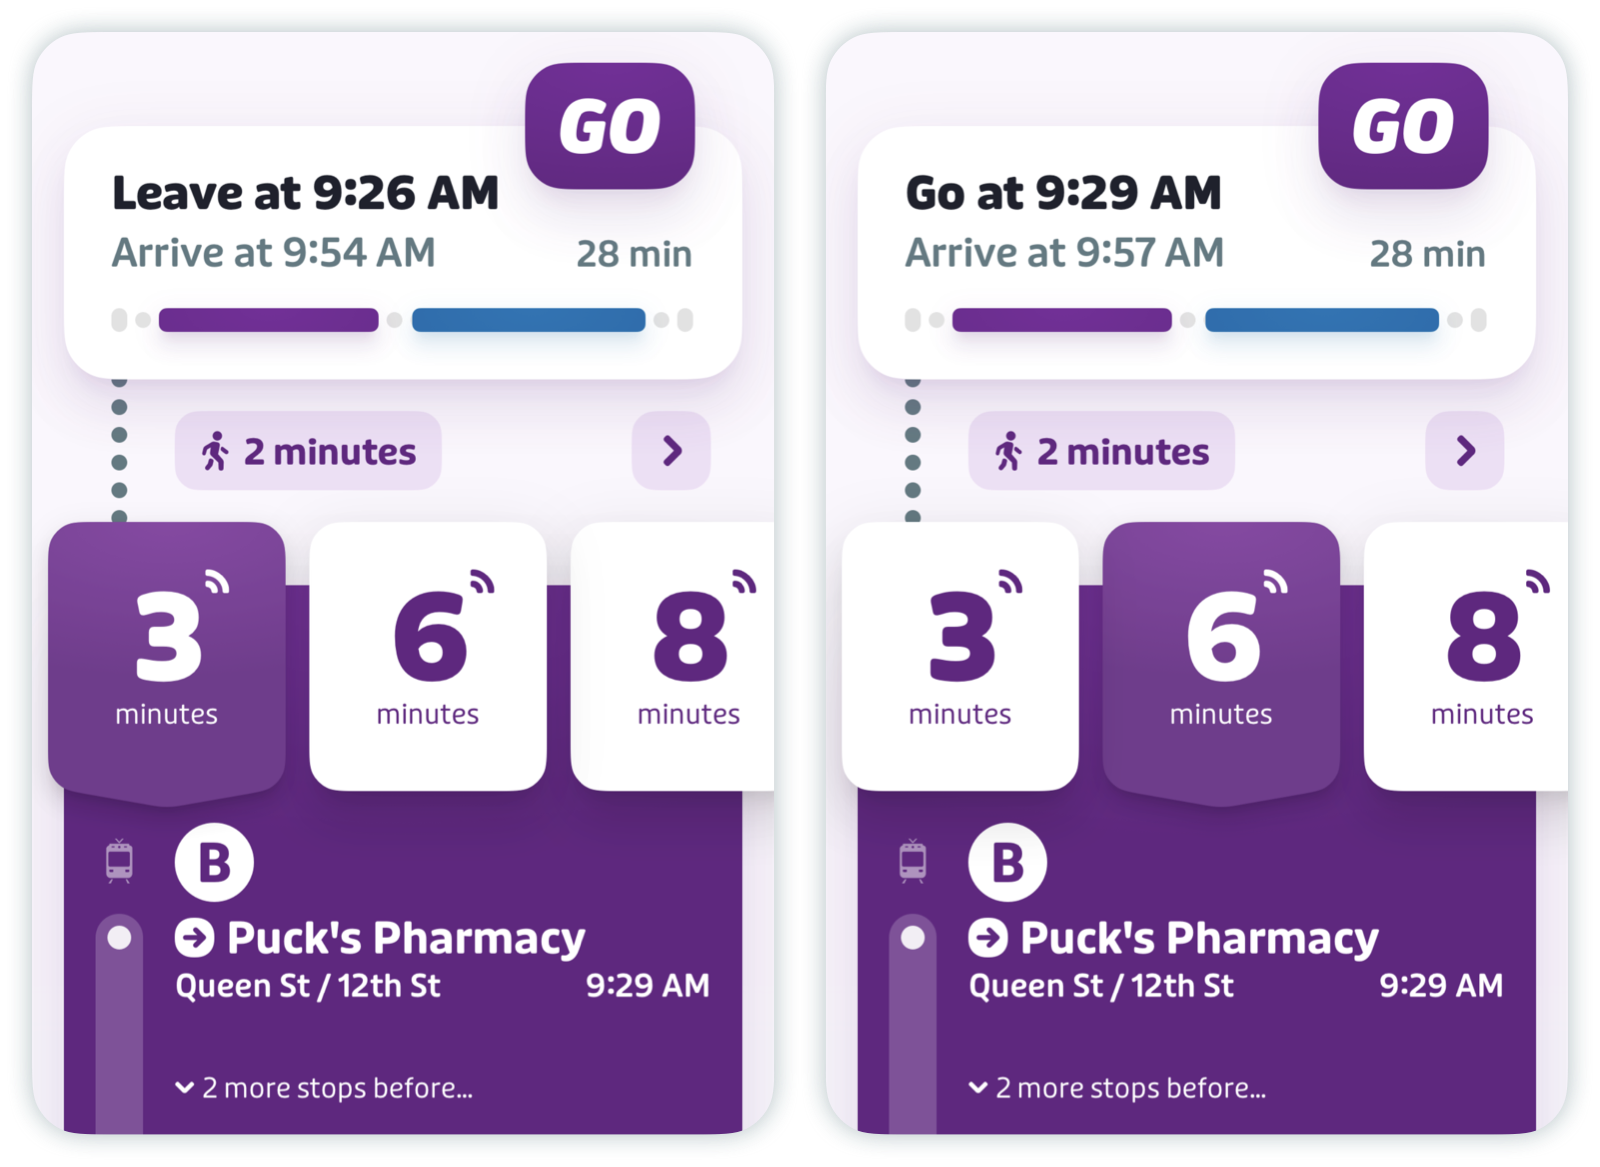
Note: You can change the selected departure for a GO trip before or after starting GO!
From a route
-
Already at or close to your stop? Select the line you’ll be taking from the list on the main screen and tap GO.
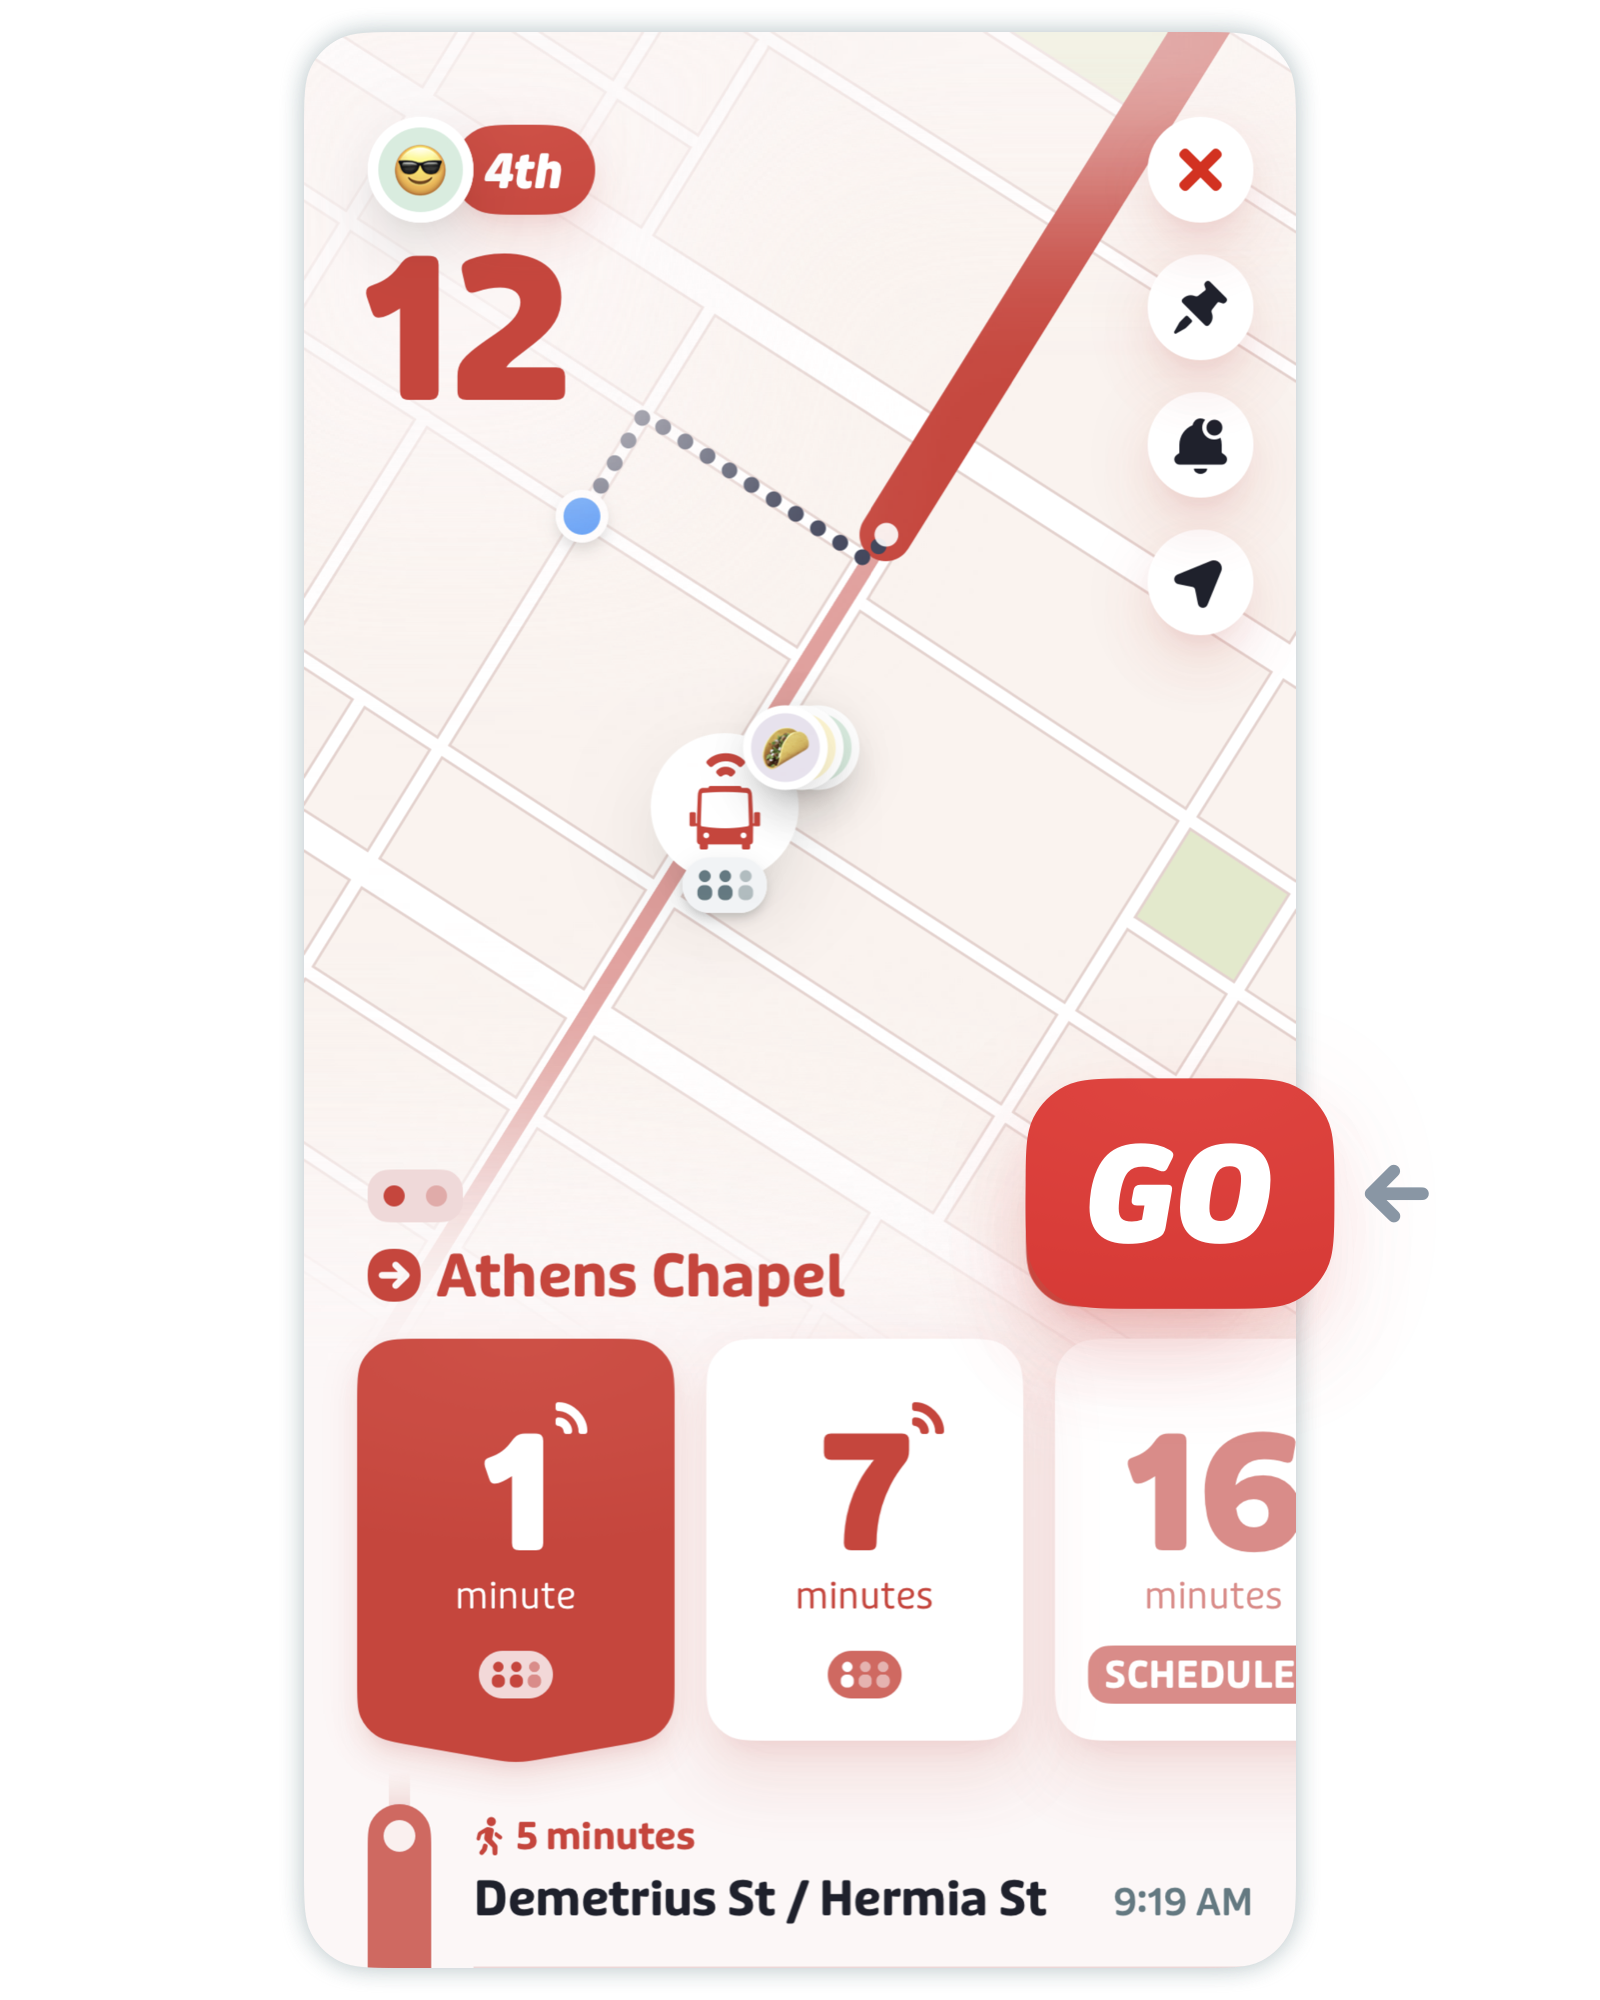
Just like starting GO from a trip plan, you can switch to a different departure before or after starting GO by tapping on the relevant ETA card.
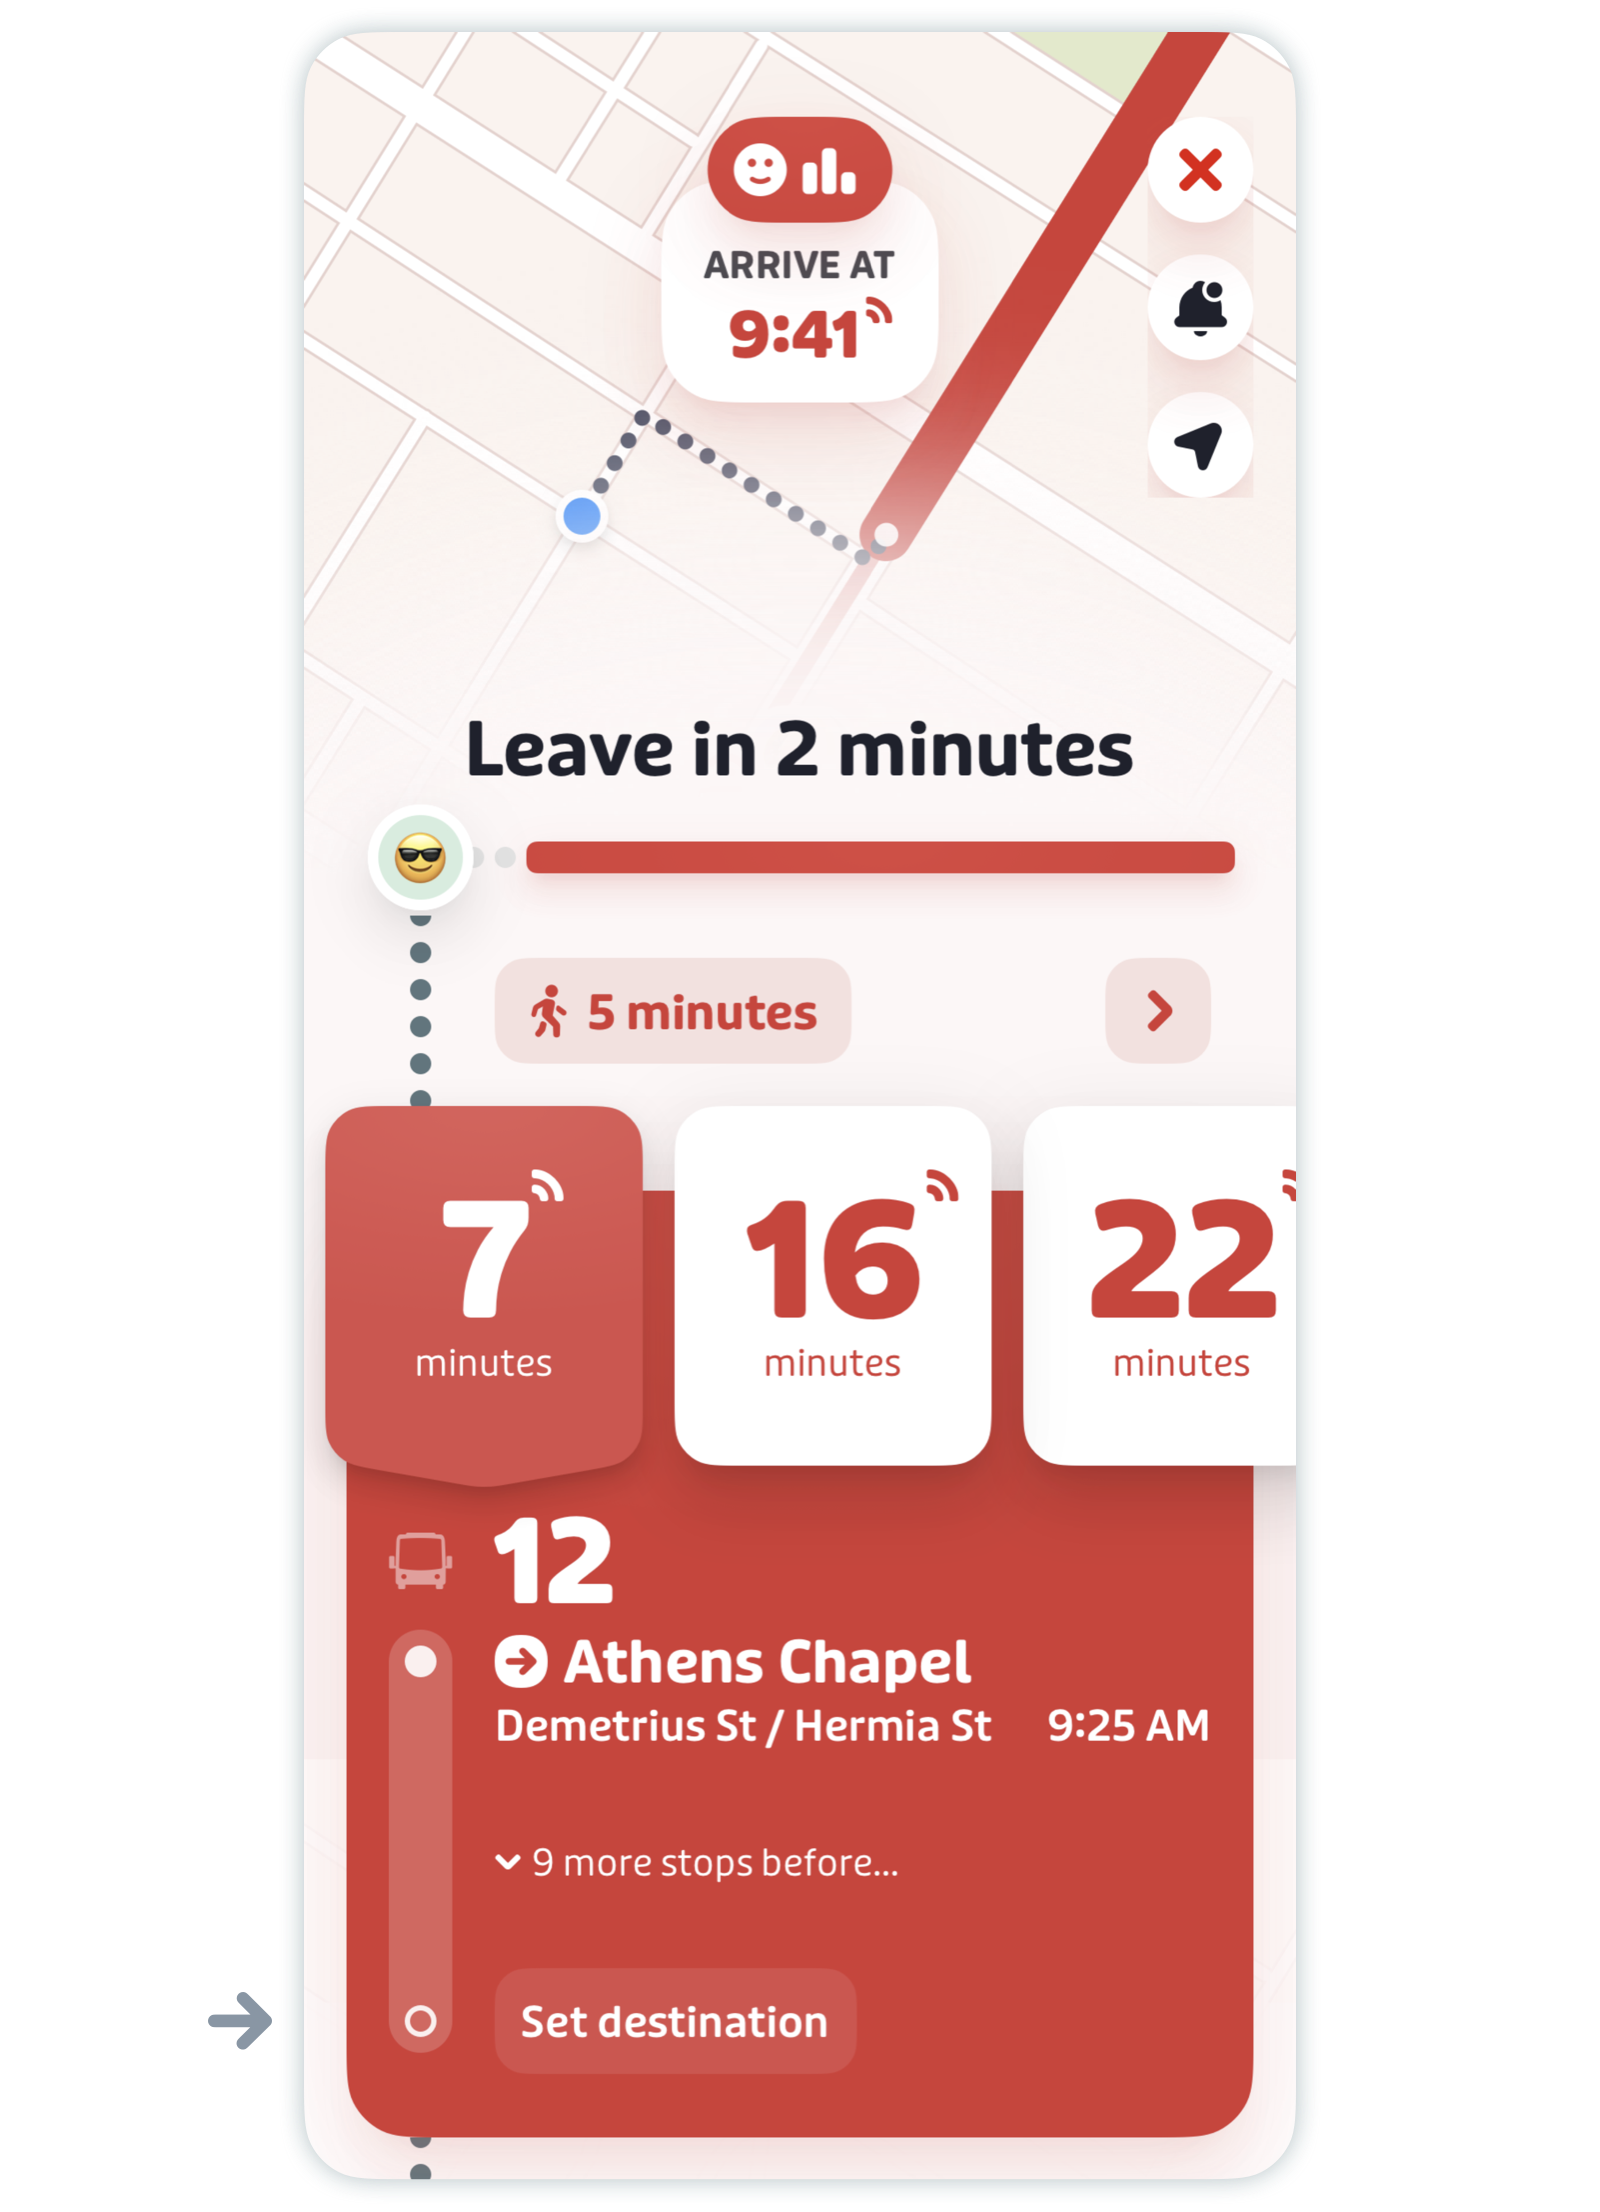
• You can then select your destination stop at the bottom of the screen to receive a notification when it's time to get off.
What if I'm already on the bus or train?
When you open Transit while riding a bus or train, just select the line in question from the main screen and tap the GO button. Wait a few moments and Transit will detect that you're on board.
It doesn't matter if the departure listed isn't the one you're on. Because GO detects whether you're on a vehicle or walking, once you've selected a line and Transit has detected that you’re on board, it dismisses all other scheduled (or real-time) departure times. GO will adjust to show information about your current trip.
Track your trip with GO
Live Activity, Live Notifications, and Dynamic Island
Don’t wanna fiddle with your phone to check up on your trip? Transit’s Live Activities feature is for you. (On Android, we call it Live Notifications.)
Here’s how to turn it on:
- iOS: Go to Settings > Apps > Transit, then make sure Live Activities is turned on.
- Android : Go to Settings > Apps & notifications > Notifications > choose Lock screen notifications or On lock screen and select Show alerting and silent notifications or Show all notification content (depending on your device and preference)
When you start GO, the lock screen widget will show your entire trip at a glance so you can easily check on its progress. Instead of sending multiple notifications throughout your trip, your phone will wake only to alert you when it’s time to take action, like "Leave now" or "Get off in 2 stops".
Once your trip is over, the widget dismisses itself and you can rate your ride the next time you open the app!
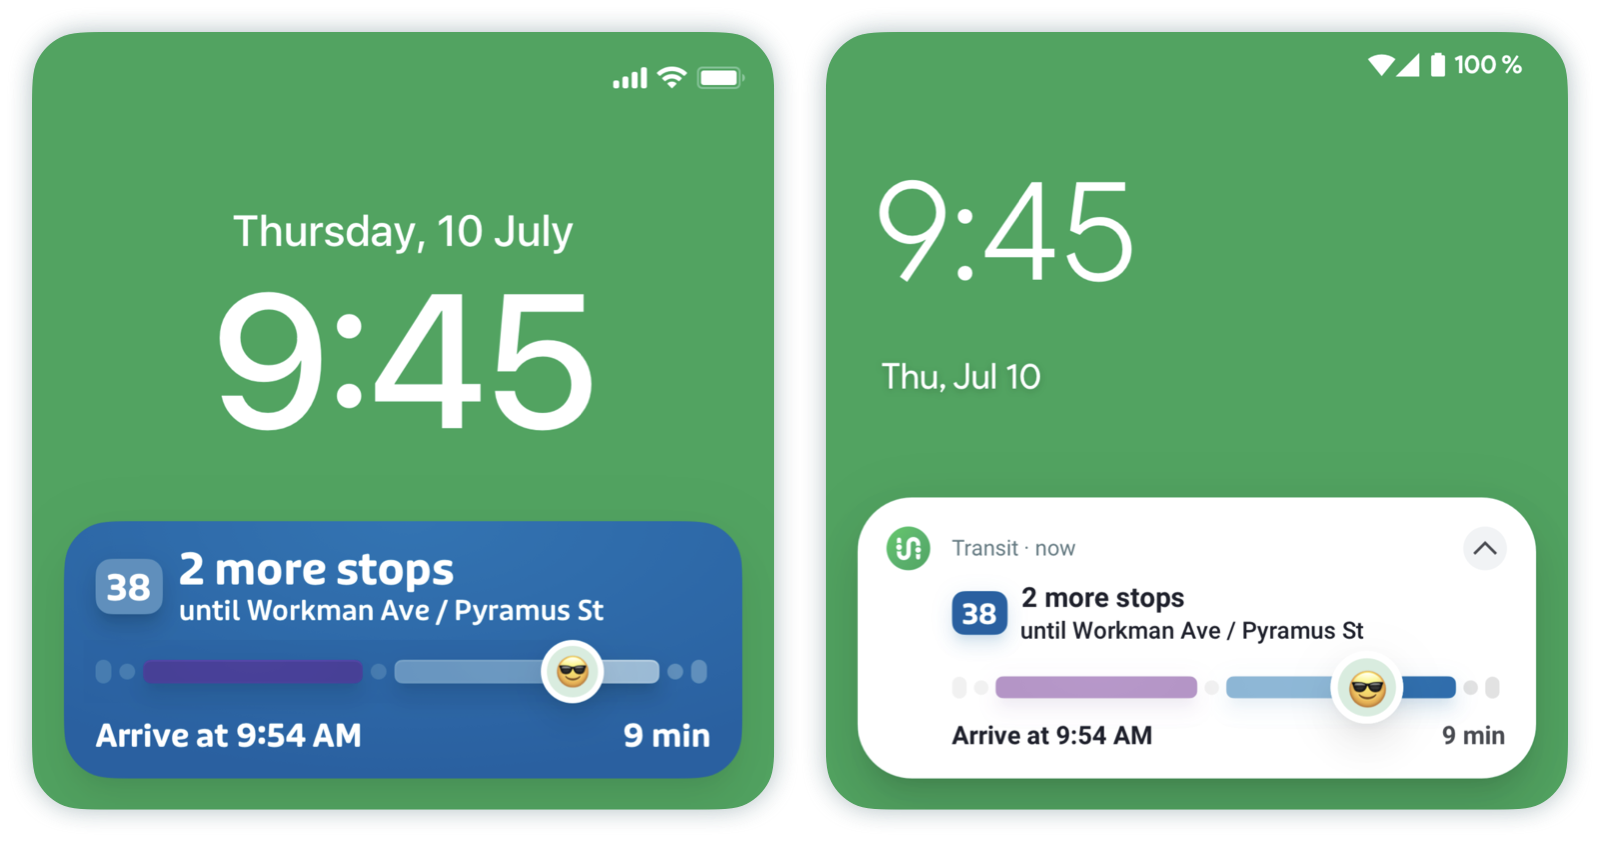
Live Activities requires iOS 16.1 or later. Live Notifications requires Android 11 or later. Version 5.13.0 or later of the app is required to use this feature on either platform. It also supports VoiceOver and TalkBack for low-vision users.
iOS only: Dynamic Island
With Dynamic Island, your GO trip is always just a tap away, and important information is displayed directly. If you need to get off soon or hurry to catch your ride, the Dynamic Island will get larger to catch your attention. Tapping a Dynamic Island notification will launch the app to display your trip in its entirety.
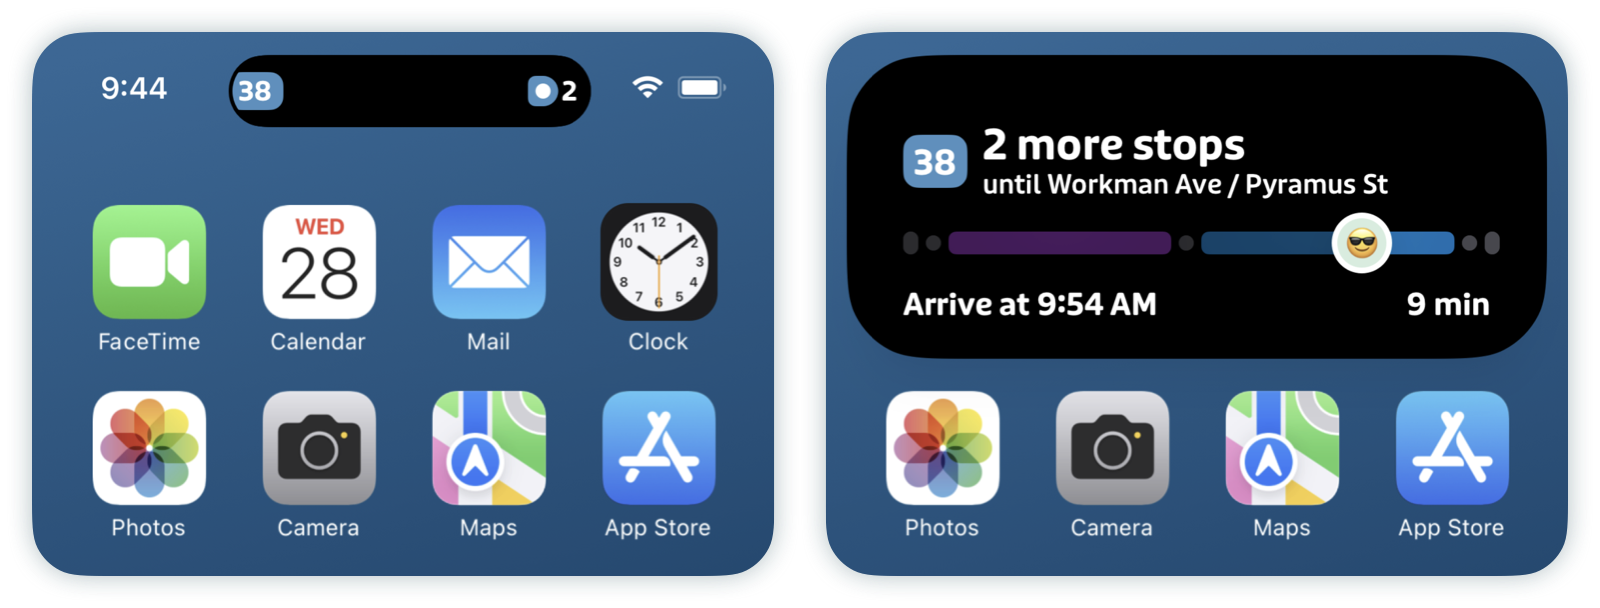
The Dynamic Island feature is only available for select iPhone models, starting with iPhone 14 Pro or iPhone 14 Pro Max.
Minimize GO
You can minimize the GO screen to allow you to browse the rest of the app without leaving your trip.
- On iOS: Swipe down from the top of the GO screen or from the “minibar” in the center of the screen. You can also tap the X in the top right corner.
-
On Android: Tap your phone's back button or swipe back.
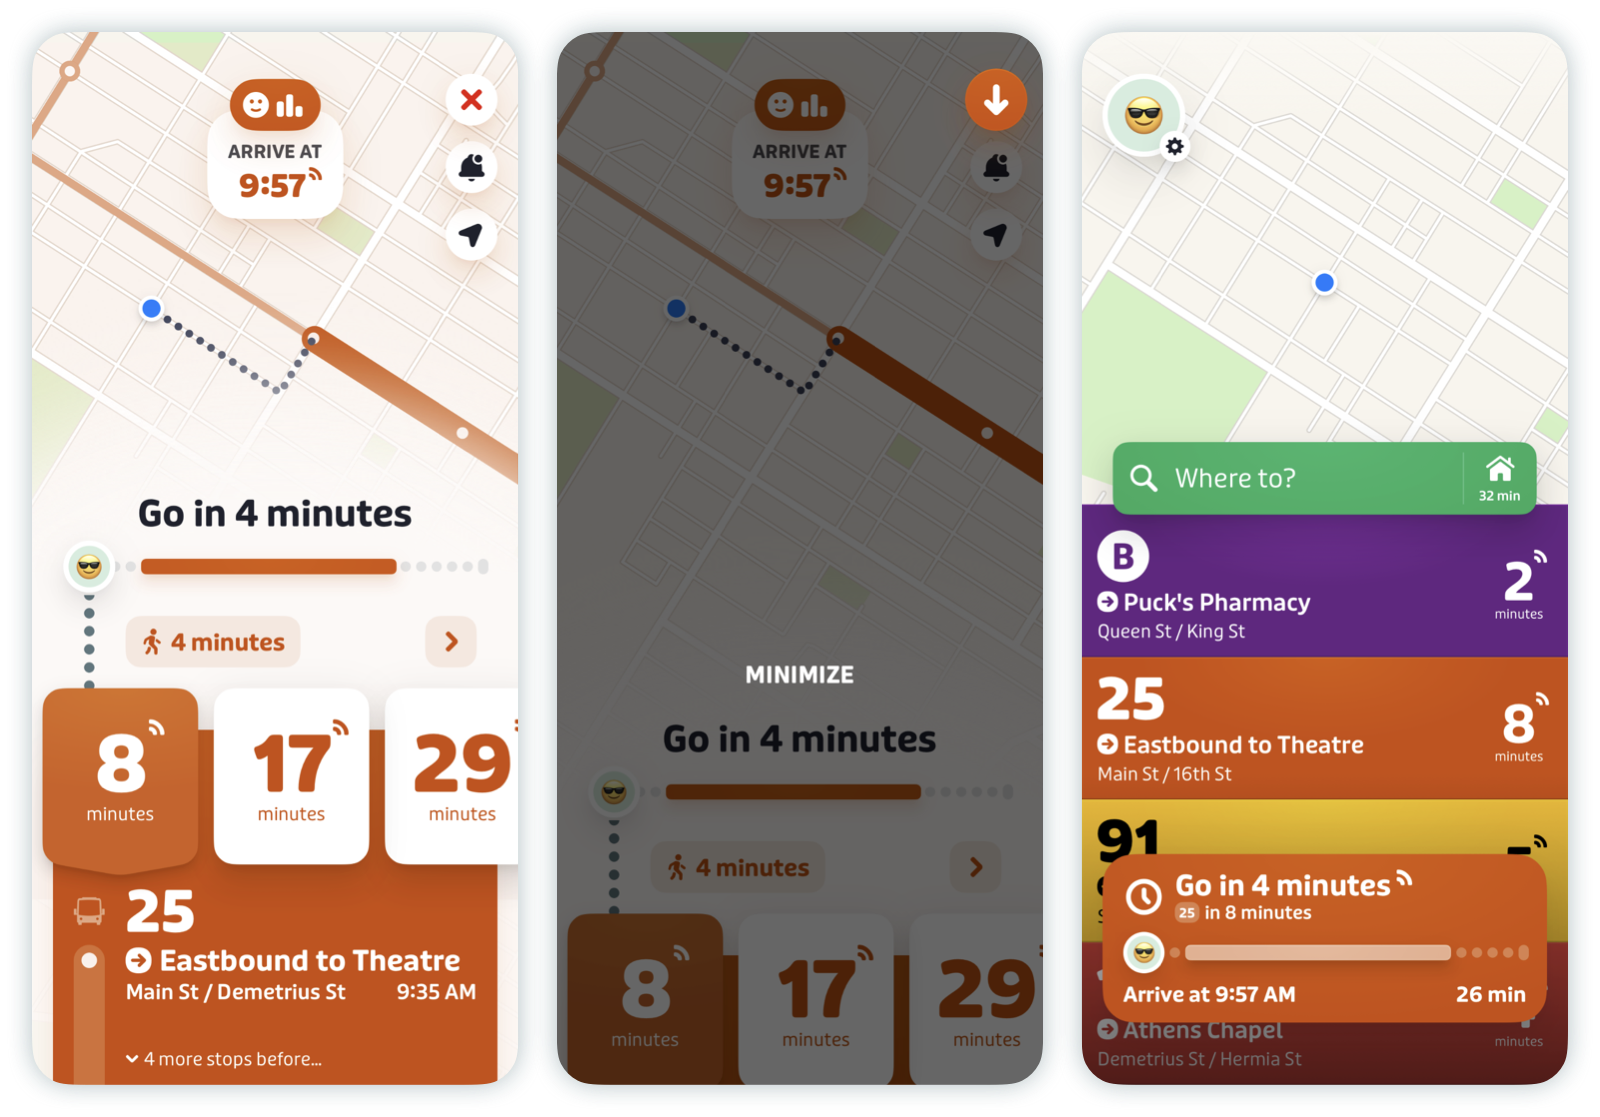
- Tap the minibar at the bottom of the screen to enter GO again.
GO settings
Customize notifications
Transit’s GO feature helps you navigate your local transit system by sending notifications to guide you through a trip step-by-step.
Tap the bell icon while in a GO trip to customize how and when you’ll be notified about your trip.
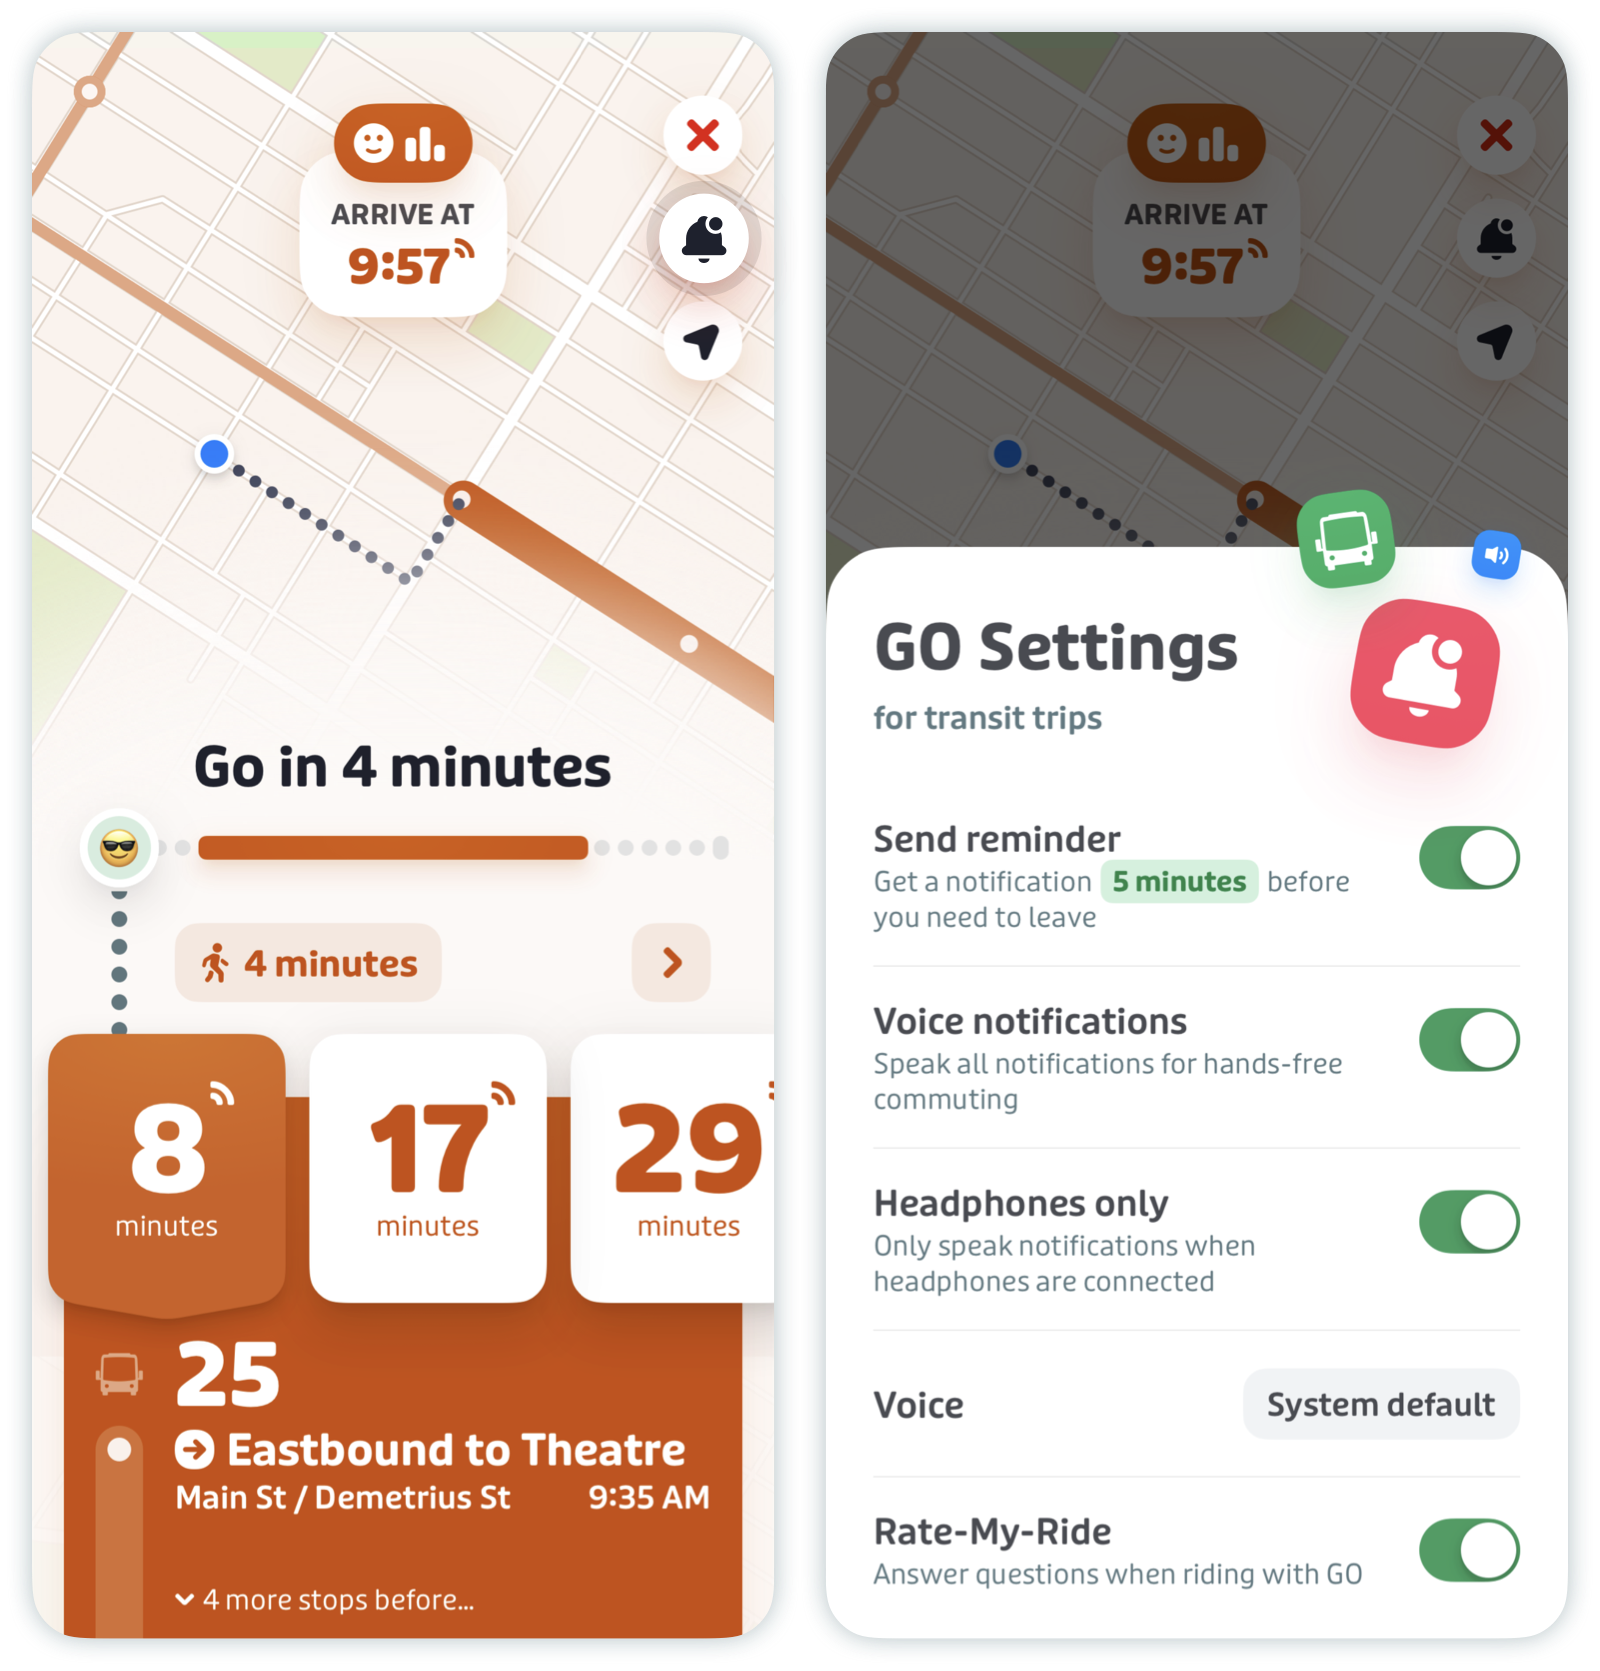
- Send reminder: get a notification before you need to leave. Tap the highlighted box with "X minutes" to customize exactly when to receive a notification
- Voice notifications: choose whether to speak all notifications
- Headphones only: only speak notifications when headphones are connected
- Voice: Select a different voice for announcing notifications
- Rate-My-Ride: Answer questions when riding with GO
Note: this options menu is only available after starting GO.
Download additional voices for GO
It’s possible to browse and download additional voices on your phone’s operating system that can then be selected in your GO settings.
iOS:
- Go to Settings, then Accessibility > Voiceover > Speech > Primary Voice > Voice.
- Here, you’ll be able to browse different voices and download them. Once a new voice is downloaded, it should appear as an option in Transit.
Android:
On Android, you can tap "Voice" and "More voices" on the GO settings screen to download additional voices.
Otherwise, you can do so in your settings:
- Search for "Text-to-Speech" > Tap the gear icon > Tap "Install voice data" > Select a language and tap the download icon next to the voice you want.
Adjust walk times and speed
For individual trips
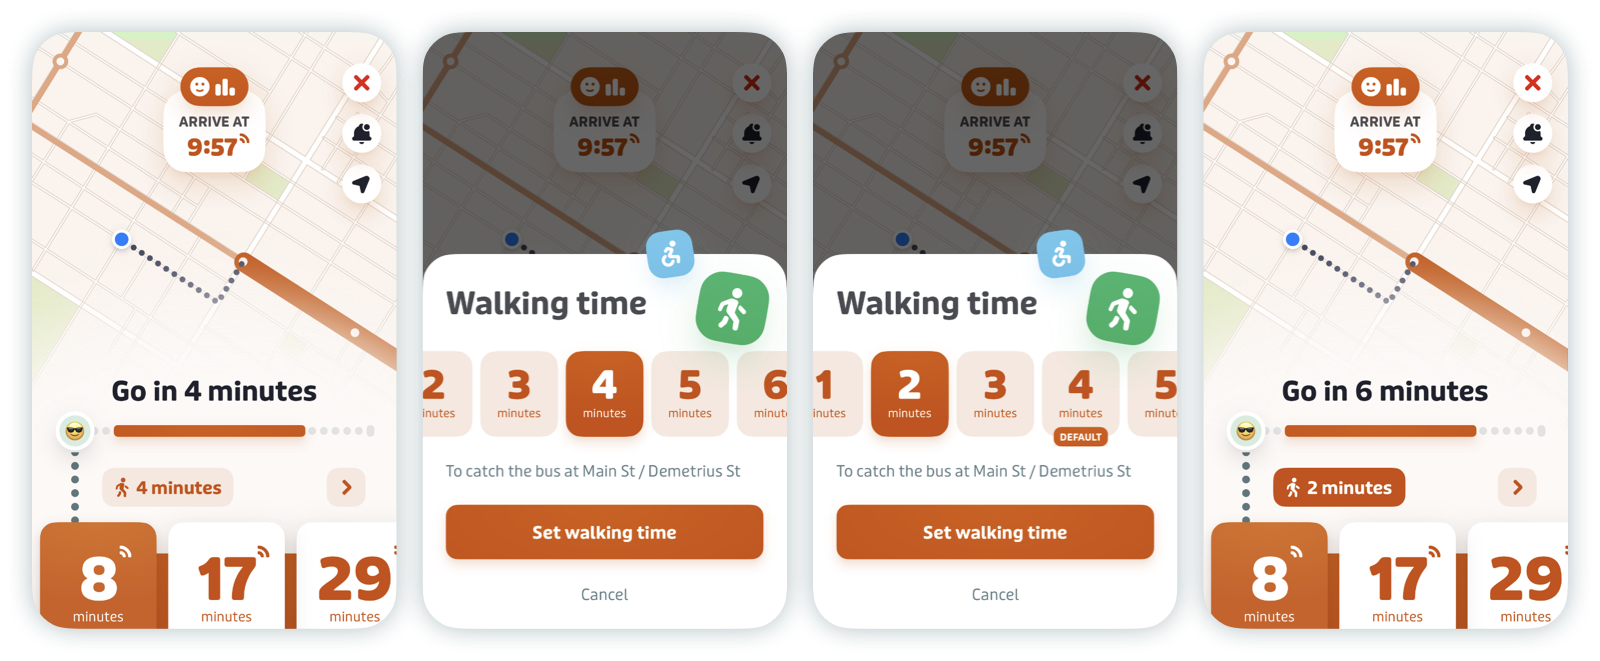
Tap the "x minutes" walk box to adjust the estimated walking time. GO will remember the walk time you specified for the next trip!
For all trips
You can also adjust your walk speed to improve walk time estimates across all trips. Here’s how:
- Tap the gear icon at the top left of the main screen.
-
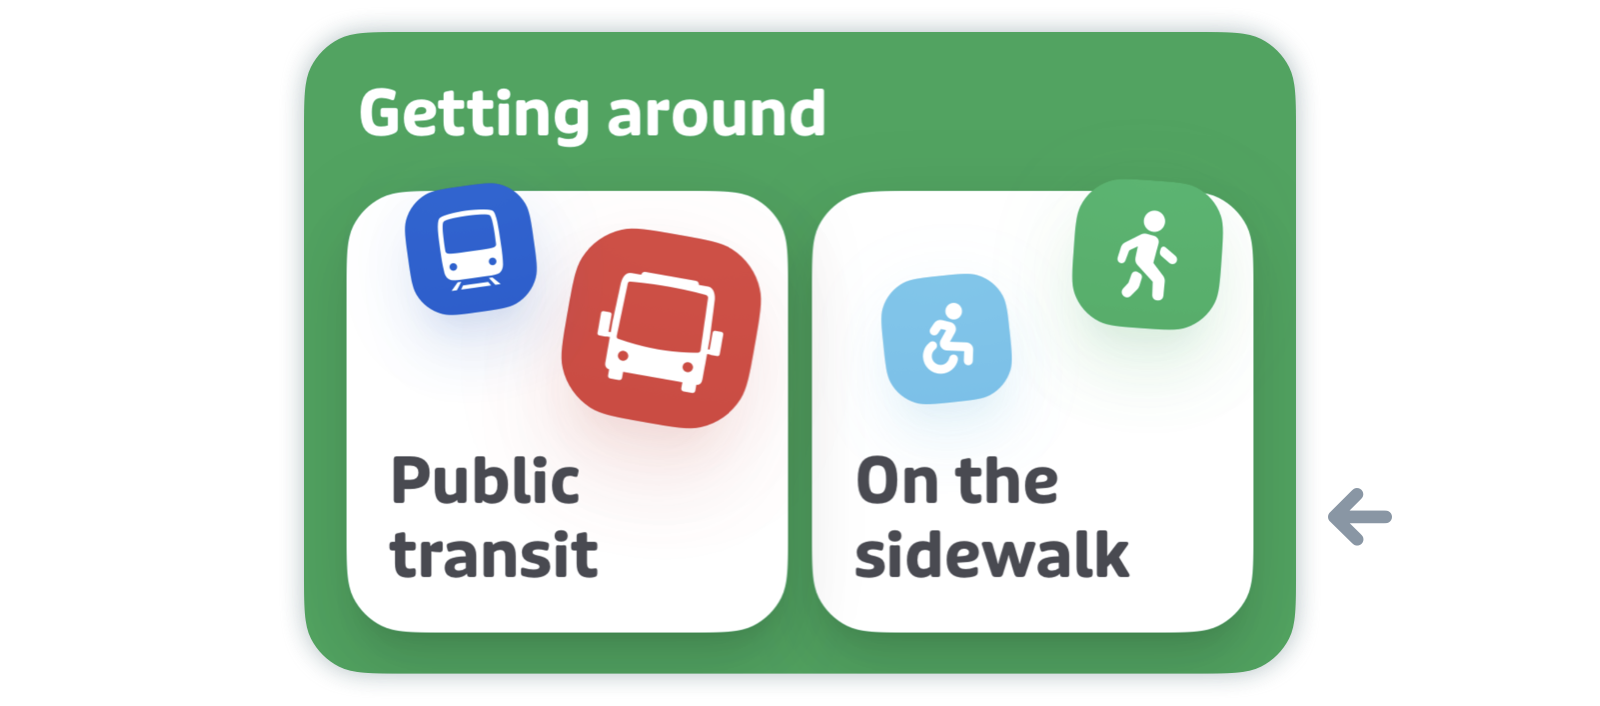
Scroll down to "Getting around" and tap "On the sidewalk".
-
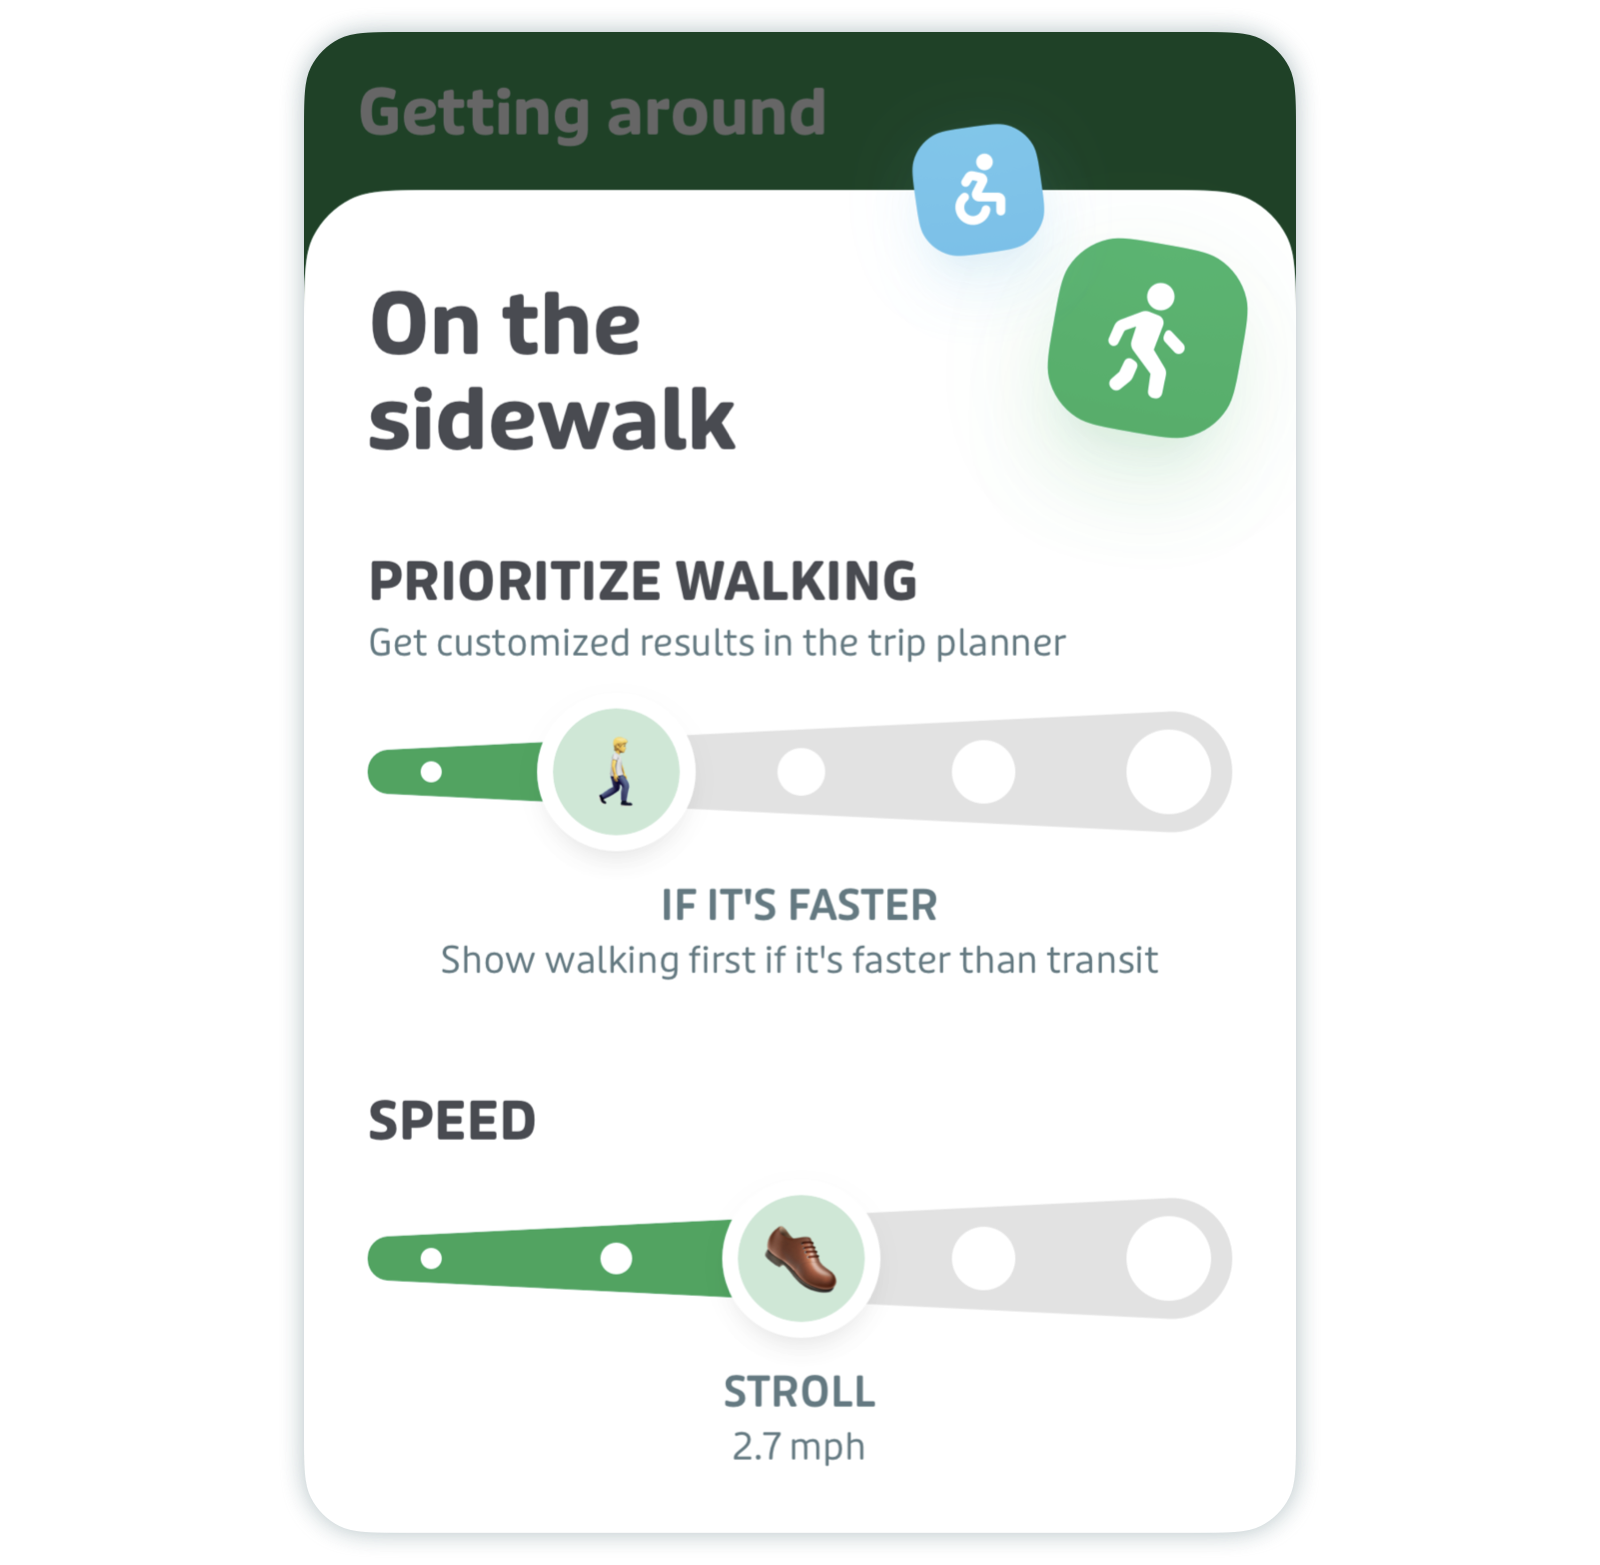
Here you'll be able to adjust your walk speed. The settings below are the default ones.
-
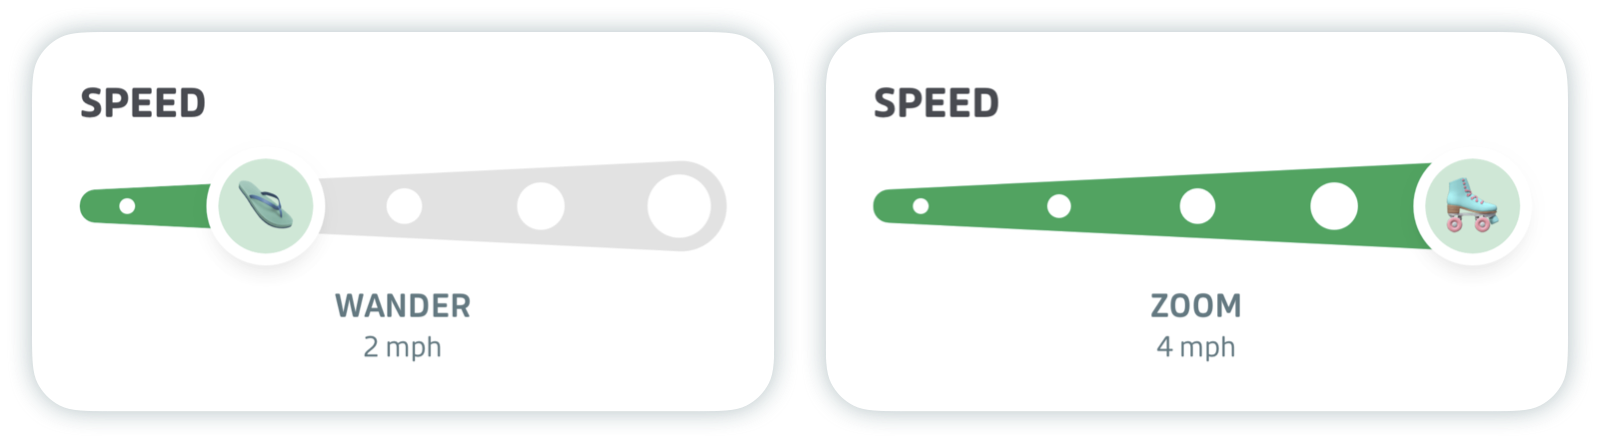
Adjust your speed at your convenience.
-
Walk time estimates in GO will now reflect your adjusted walking speed!
Share your GO trip
It's now possible to share your GO trips with other Transit users! Sharing your GO trip allows you to share your live location and routes in realtime.
How to share your GO trip
- Launch a GO trip, then tap the share icon in the top right hand corner.
-
In the prompt, select "Send invite link".
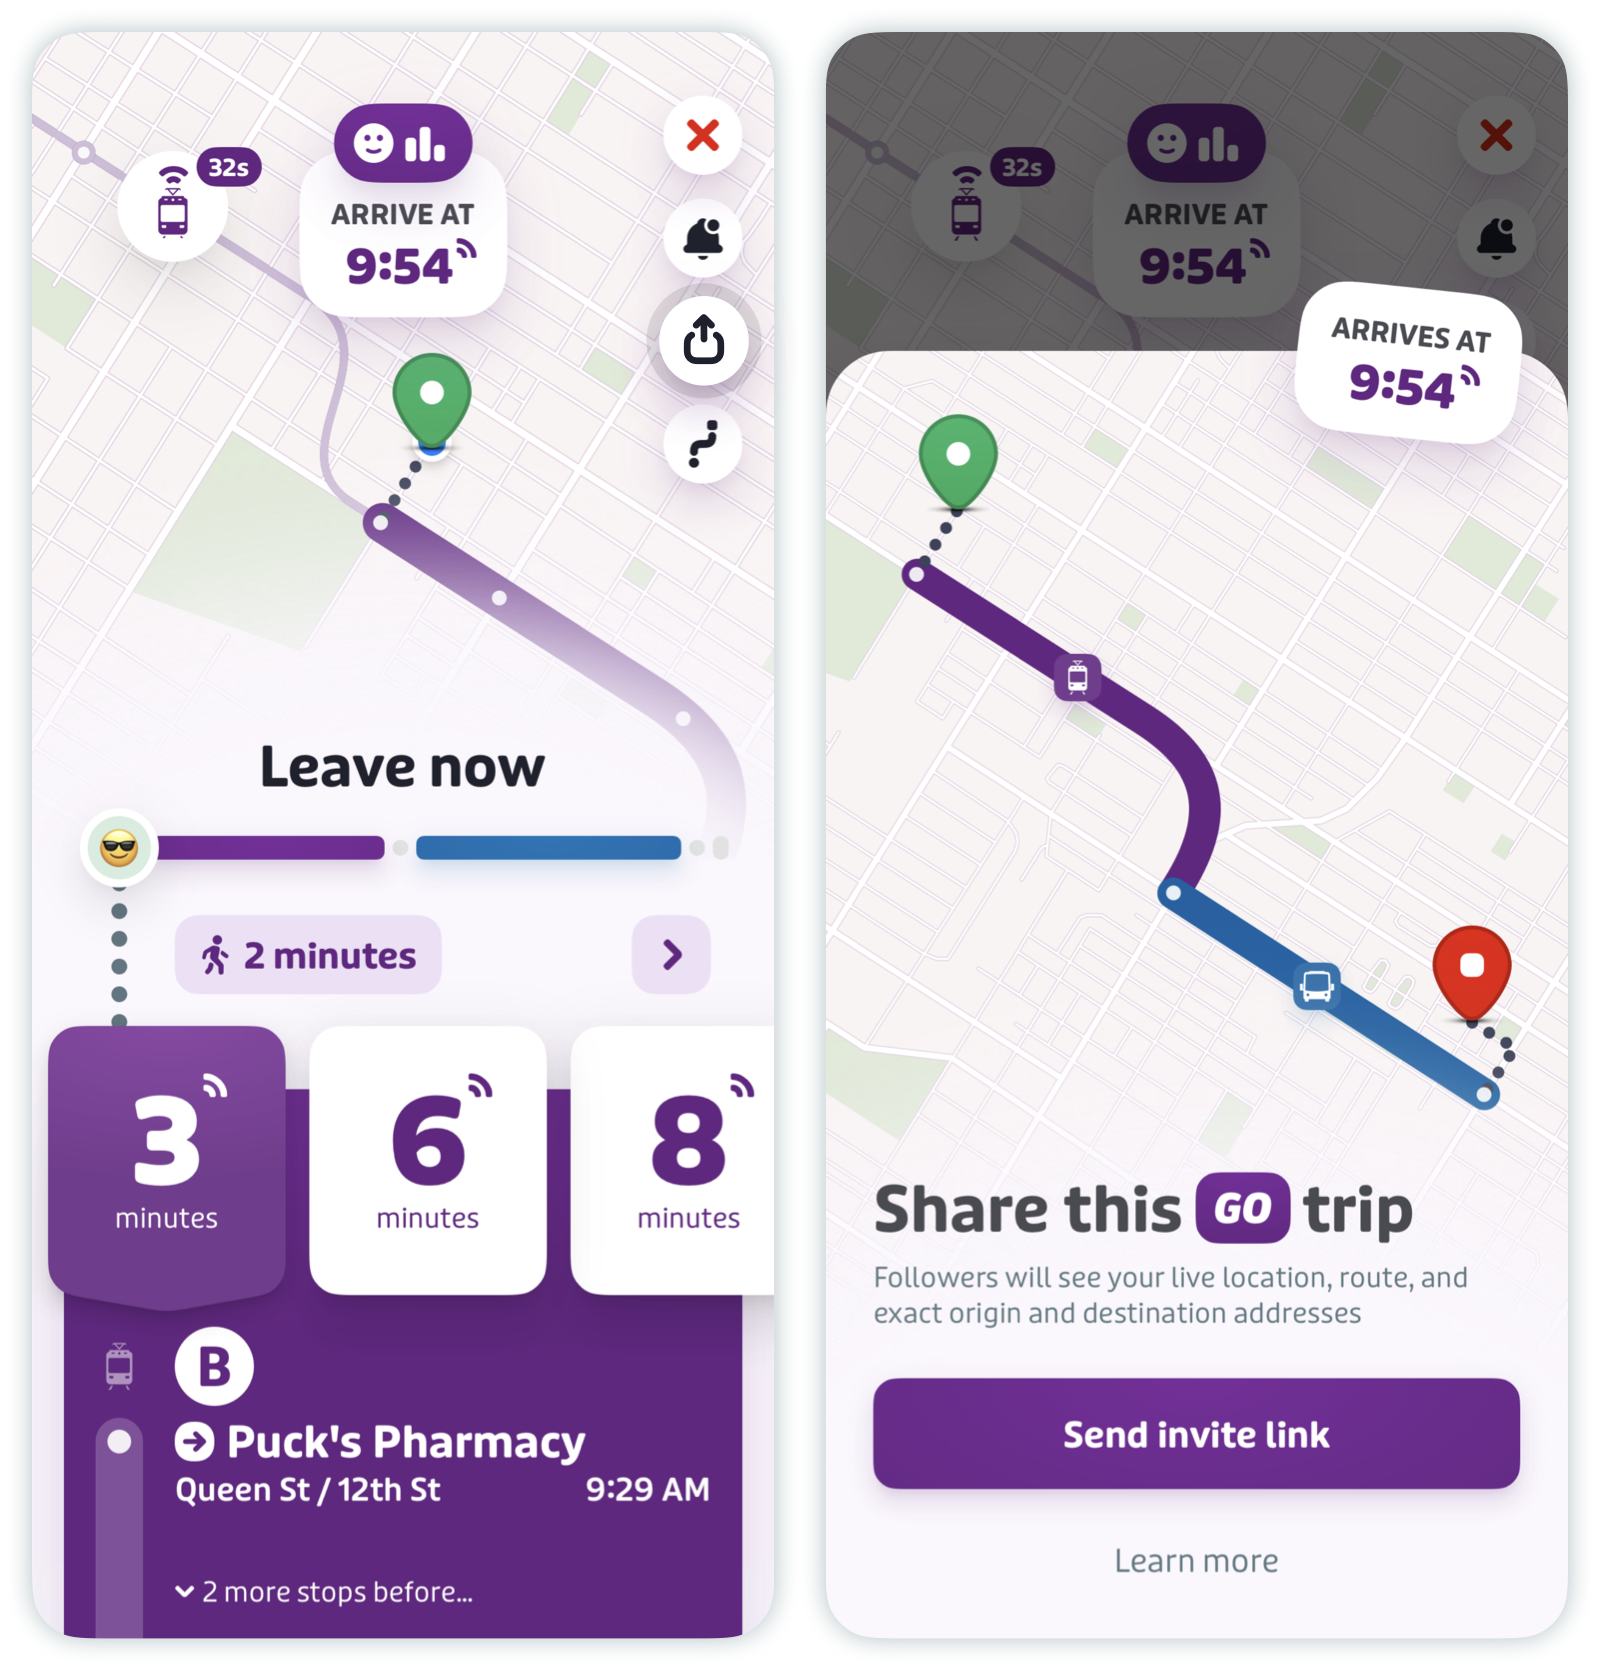
- You'll then have an option to copy the link or share it directly on an application of your choice.
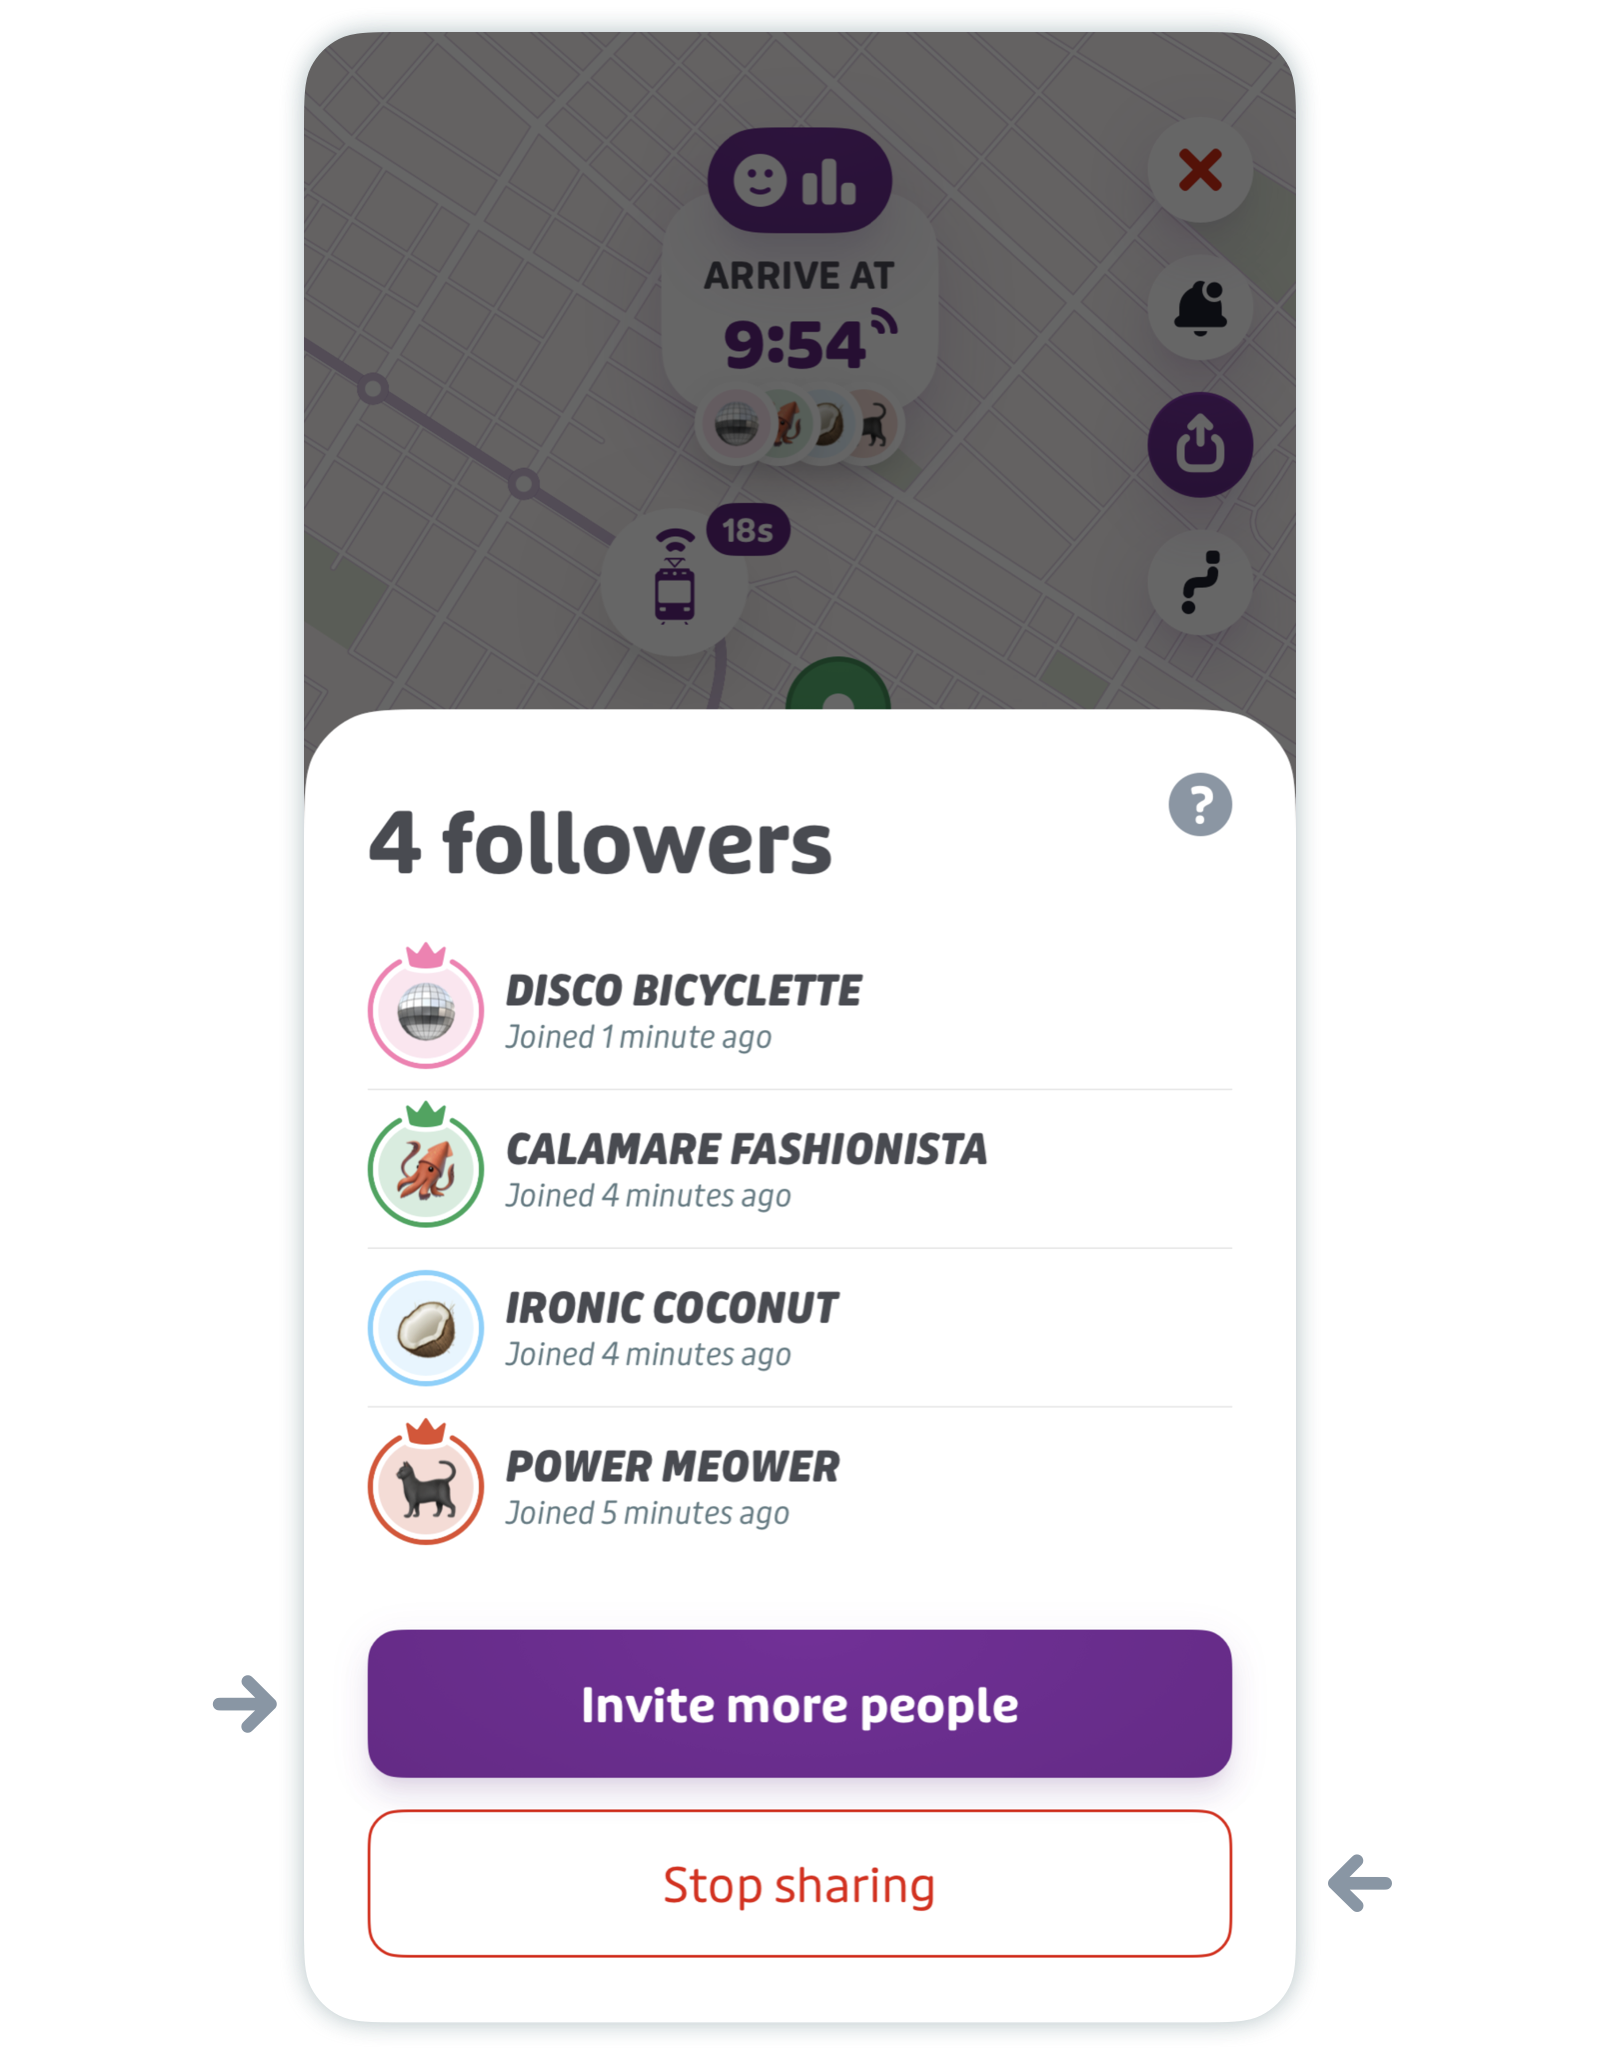
- To share your trip link with more people, tap the share icon again and select "Invite more people".
-
To stop live sharing, tap the share icon again and select "Stop sharing".
What is visible to people following your GO trip?
Once you tap "Send invite link", anyone you share your link with will be able to follow your GO trip in real-time. They'll be able to see your exact origin and destination, your live location, your estimated time of arrival (ETA), as well as each leg of your journey.

Note: Anyone following your trip (i.e. anyone with access to the link you’ve created) can see your exact origin and destination addresses and your exact location in real-time. Only share this information with people you trust, and exercise caution when sharing this link publicly.
To see who’s following your trip:
-
Once someone joins your party, their avatar will appear at the top of your GO screen (under your estimated arrival time). You can tap their avatar or tap the share button again to see who is following your trip.
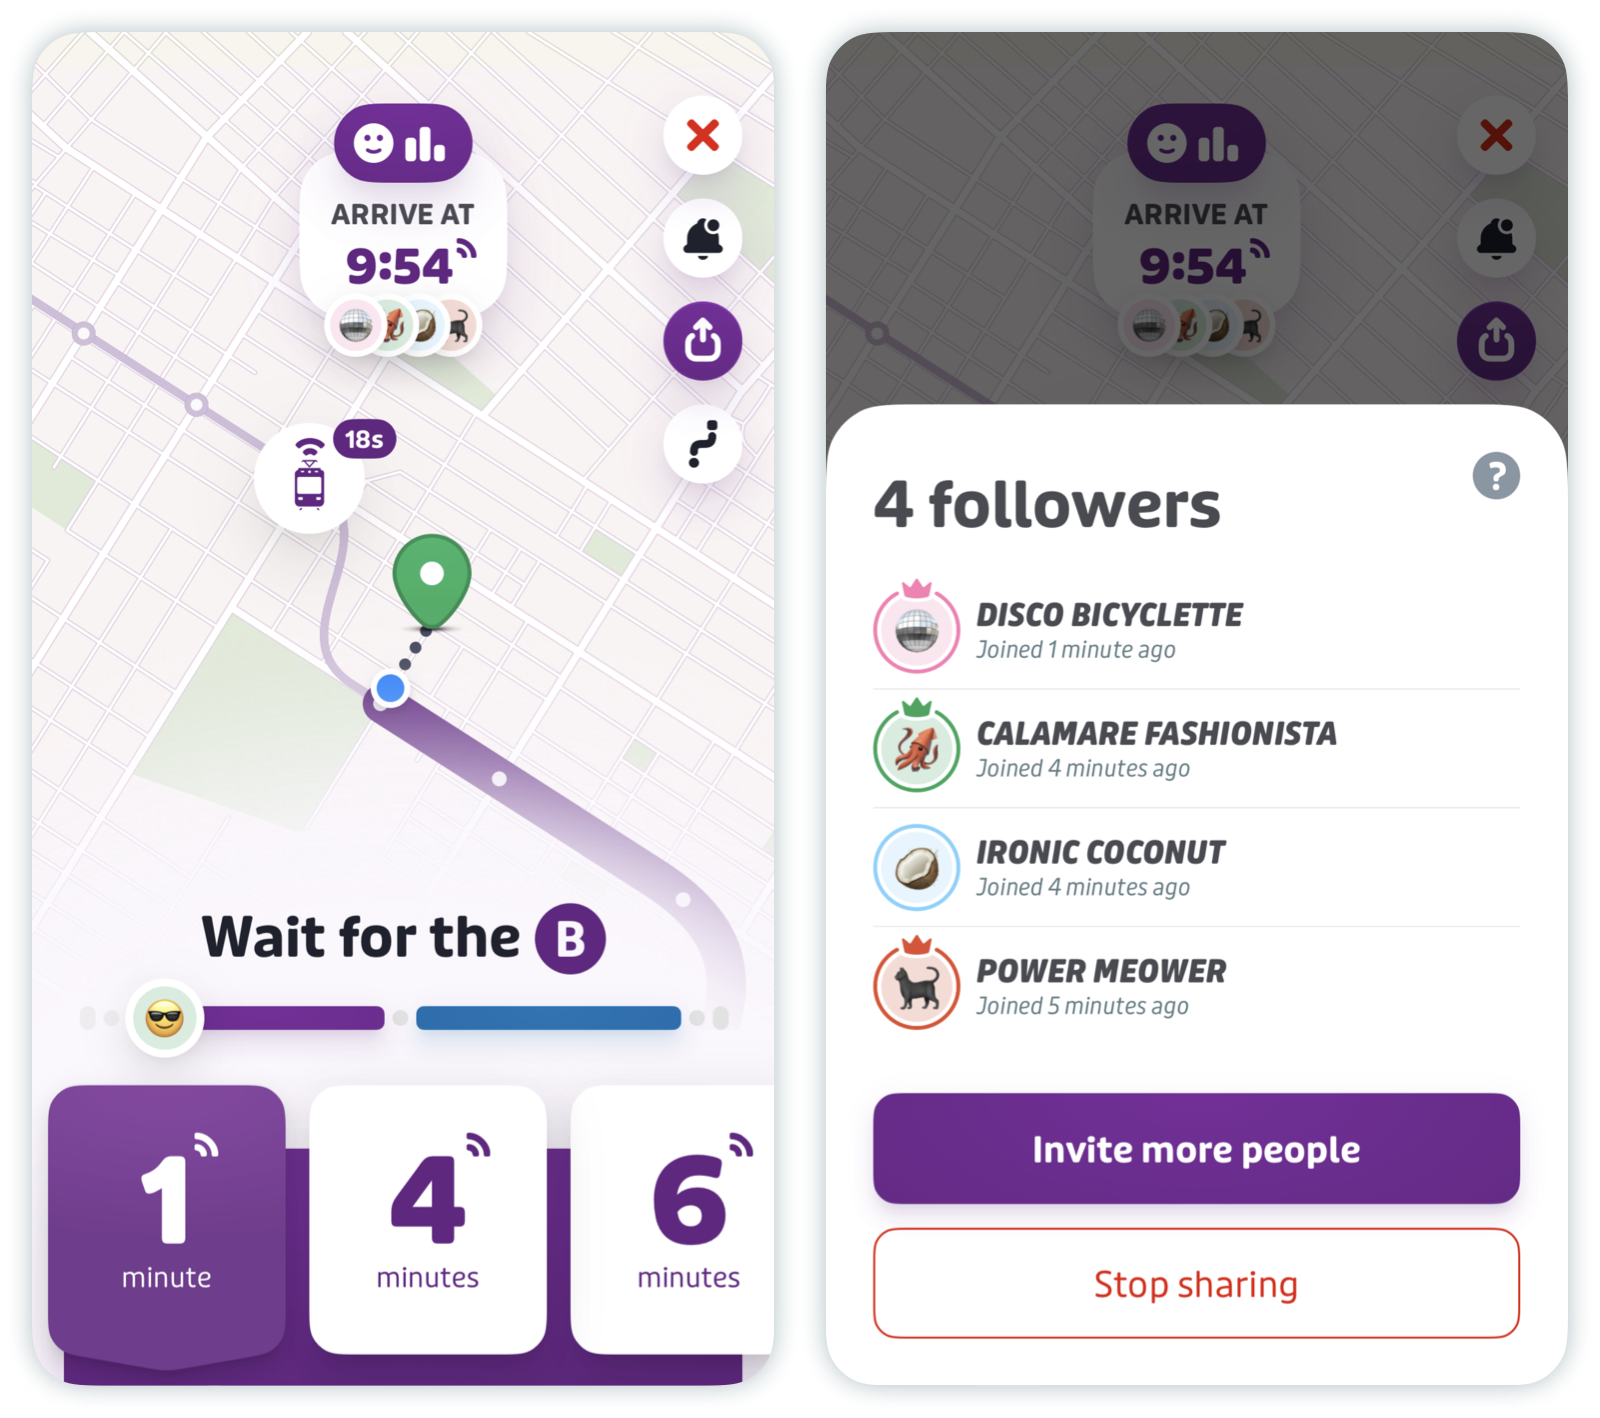
- If you have Transit open in the background, you’ll get a push notification every time a new user joins your trip.
Please note that there is no limit on the number of people who can follow your trip.
Will users following my GO trip be able to see the exact addresses of my origin and final destinations?
Yes. Anyone following your trip will be able to see your exact departure and final destination addresses, as well as your live location and your ETA.
Remember that anyone with the link can send it to anyone else. Make sure only to share your GO trip with people you trust.
If I share the link with someone who doesn’t have Transit, can they still track my trip?
This feature is only fully accessible to users who have Transit installed, who will able to see your complete route details, including your departure and final destination, live location, and ETA.
iOS users who don’t have Transit:
- iOS users who open a GO trip link without Transit will be redirected to a webpage with only your ETA, and a prompt to download the app. Once Transit is installed, they can tap the link again to follow your GO trip with full access to GO sharing.
Android users who don’t have Transit:
- Android users who open a GO trip link without Transit will be redirected to a webpage with only your ETA, and a prompt to download the app. Once Transit is installed, they’ll be able to follow your GO trip with full access to GO sharing.
Web users:
- Users accessing the GO trip link from any browser outside of Transit will be redirected to a webpage that only displays your ETA.
Will my data, or that of any of my followers who track my trip, be stored or collected?
The location data that we collect for GO trip sharing is securely stored and we have policies against linking app usage data to personal rider data, like email addresses and user profiles. As always, data collected is never sold to third parties or used for advertising tracking.
Want to learn more? Read through our privacy policy here
Trip history
It’s now possible to consult a detailed history of your public transit trips taken using GO! Detailed trip history information is opt-in only. If you opt-out, we’ll collect and display overall stats only (total number of trips, riders helped, and distance traveled).
- Tap the gear icon in the top left hand corner.
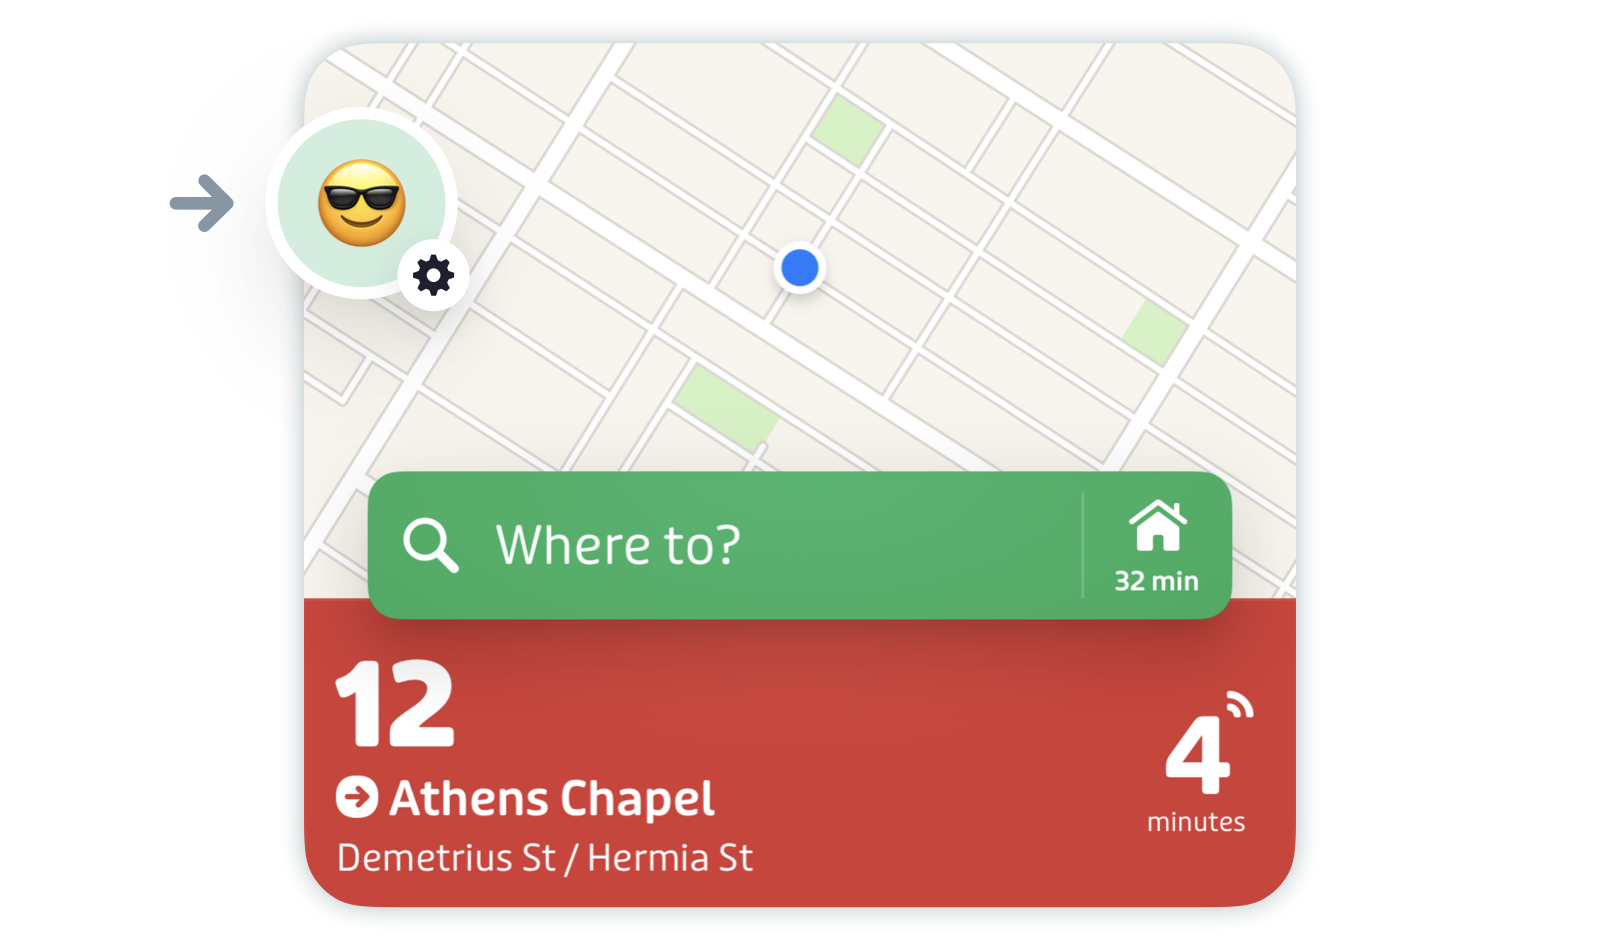
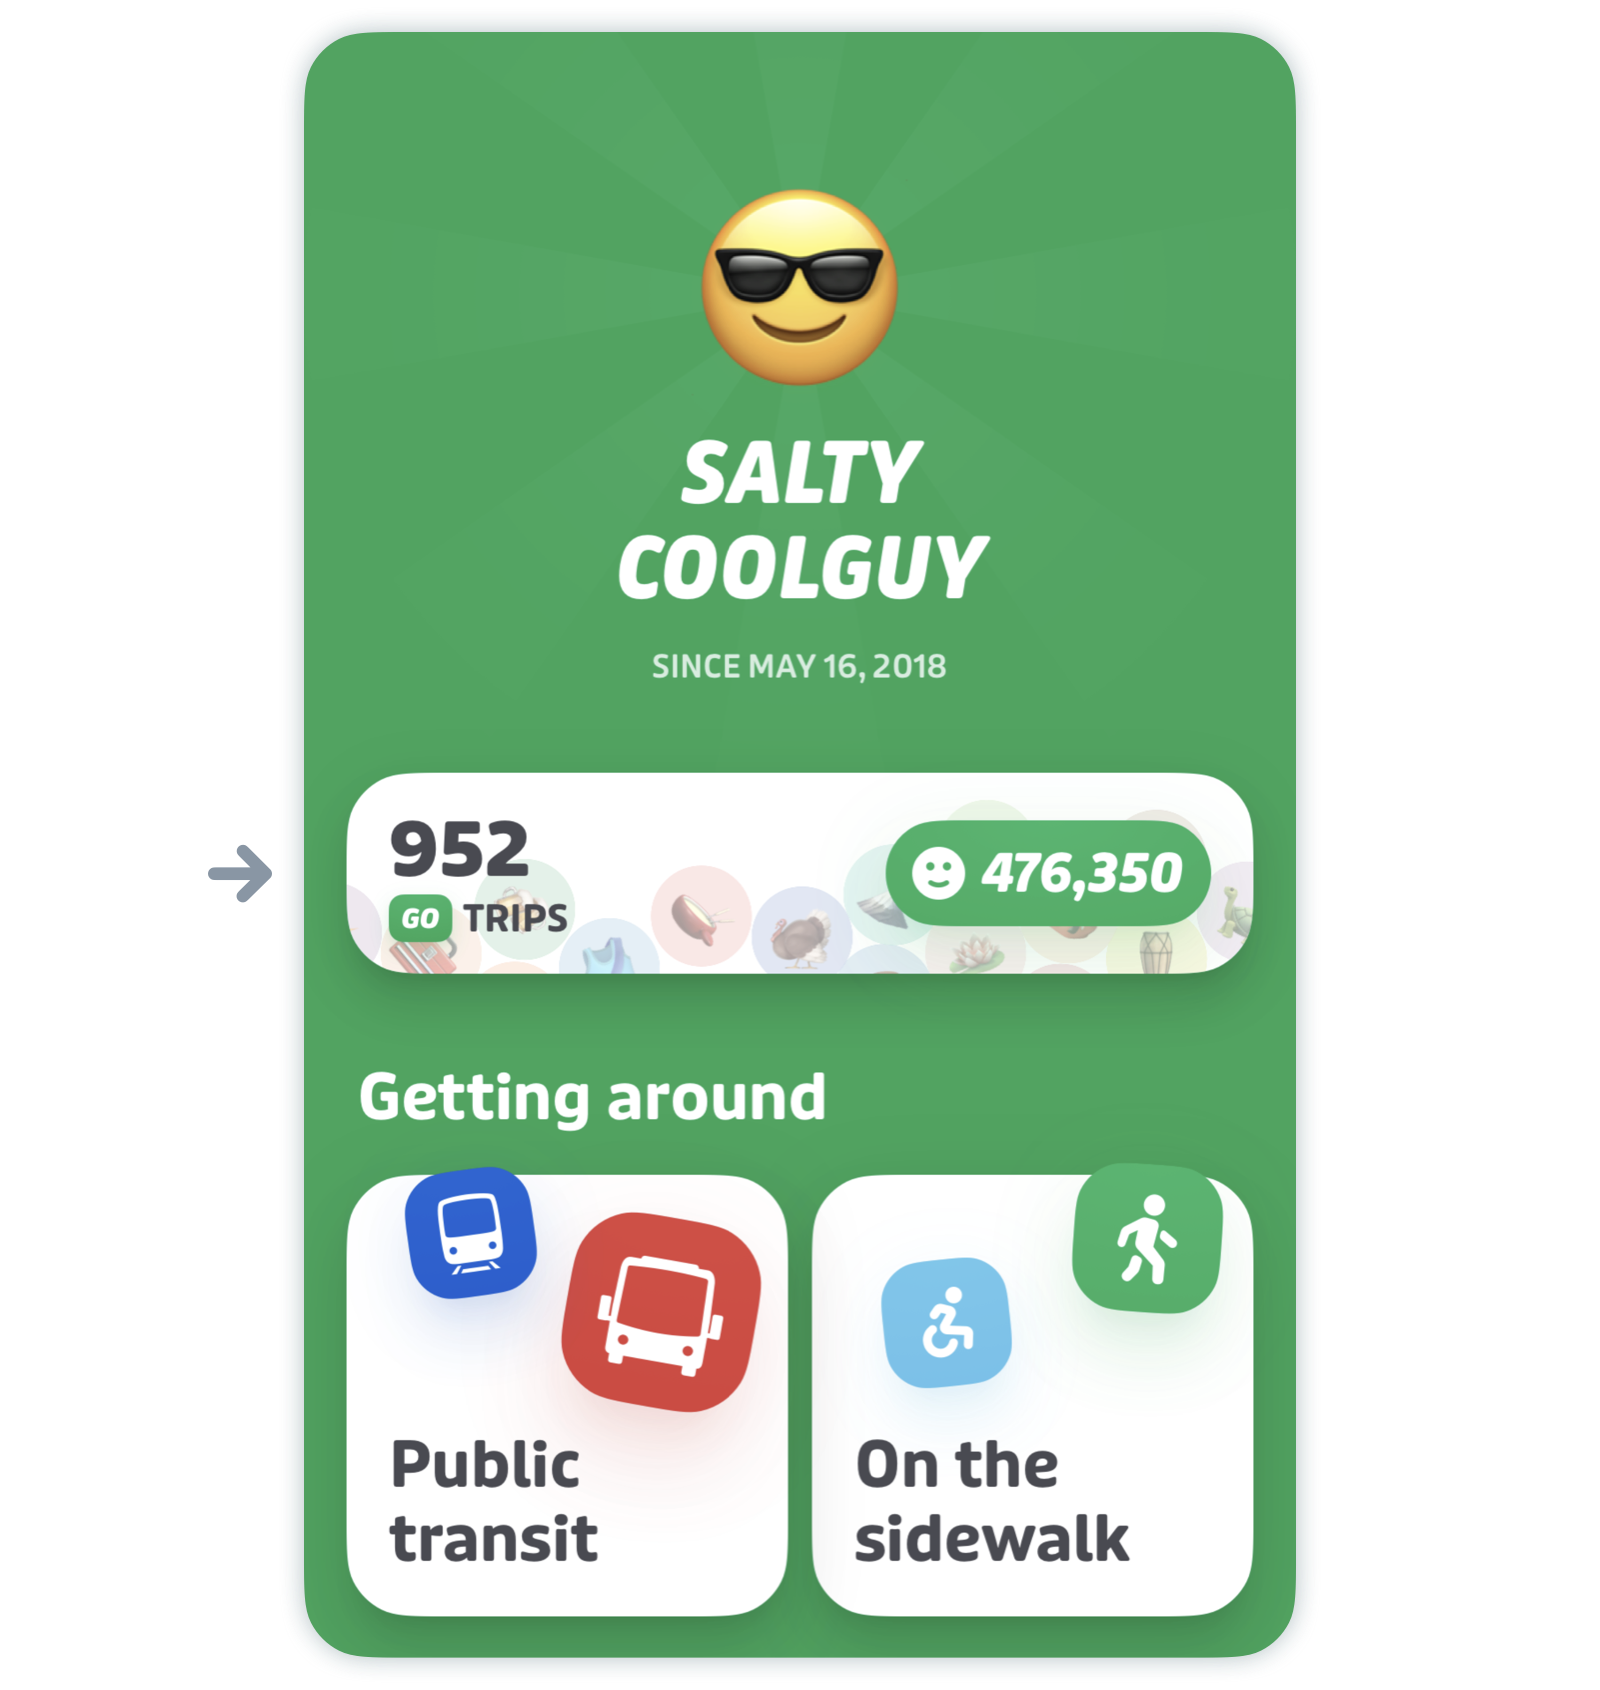
- Tap the trip history card just above "Getting around".
- That’s it! You’ll see a breakdown of your GO trips, including number of trips, helped riders, and distance traveled. Tap the cards on the top row to see how your stats (# of trips, riders helped, distance traveled, average speed and more) changed month-to-month. Scroll down for a trip-by-trip breakdown. You can also tap on individual trips for detailed information.
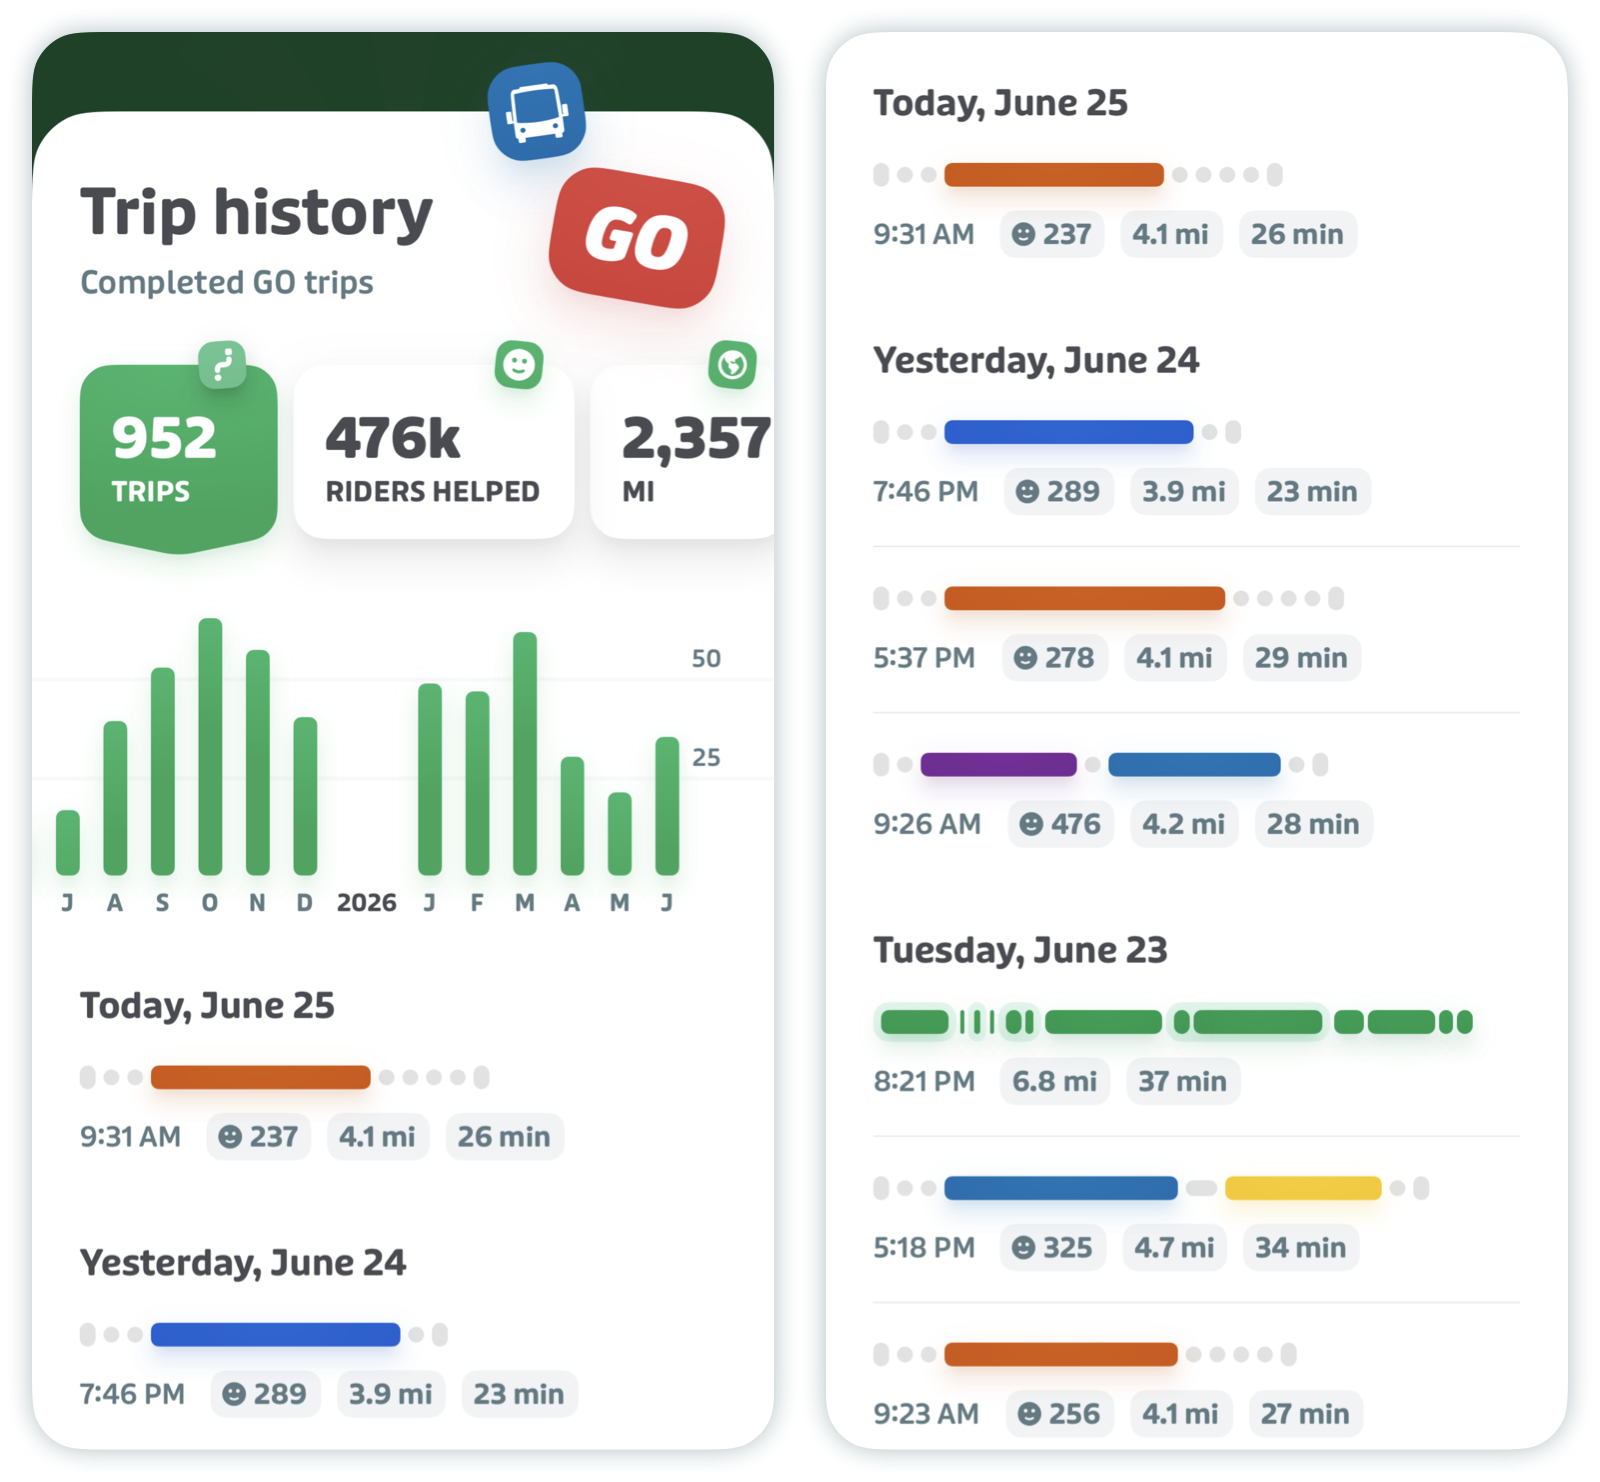
Note: if you haven't opted-in trip history, you’ll only see overall and month-to-month trip data, like number of trips, helped riders, and kilometers travelled. You won’t be able to see a trip-by-trip breakdown.
How do I opt in or out?
To opt-in:
- Tap the gear icon in the top left corner of the main screen, and then tap the trip history card. You’ll see a prompt to "Turn on trip-by-trip history". Tap the prompt, then "Enable history".
To opt-out:
- Tap the gear icon in the top left corner of the main screen and scroll down to "Settings and accessibility".
- Scroll down to "Trip-by-trip history" and tap the slider to disable trip history. You can also re-enable the feature here.
Note: if you opt out, we won’t automatically delete previously collected information. You’ll still be able to consult previous trips on the trip history page. If you’d like to delete your data, please see the instructions below (you’ll have to delete your Transit account).
What data do we collect and how is it stored?
Why doesn’t my archive include completed trips?
Why don’t I see individual trip data before a certain date?
Why am I missing details for some trips?
Can I ask for a copy of my data?
- Tap the gear icon on the top left corner of Transit's main screen.
- Scroll down to the "Help Center" and tap on "Get support".
- Long-press the "Copy" button on "Get Debug ID".
- You'll see a prompt pop up asking for your consent to share additional info; tap "Got it".
- Wait until the spinning circle disappears and you see a confirmation that the debug ID has been copied.
- Paste the ID in your email to Transit.
Can I delete my data?
- Tap the gear icon in the top left hand corner.
- Scroll down to "Account" and tap "Transit account".
- Select "Delete account" and then "Delete".
Please note that deleting your Transit account will also delete your saved locations, preferences, GO points, and payment details. You cannot undo deleting your Transit account.
For detailed instructions on how to delete your Transit account, tap or click here.
Battery, data, and privacy
While GO uses some battery, we’ve managed to keep it down to ~5% for an average 20-minute trip and that assumes you’re glued to your phone the entire ride. The same typical GO trip will take less than 100 kb of data. That’s more than a text message, but less than a kitten GIF.
As for privacy: your exact position is never shared with other riders. The position of the vehicle is only shared while GO is active and you’re on board. All data you generate using GO is anonymous, and GO automatically turns off when you reach your destination.